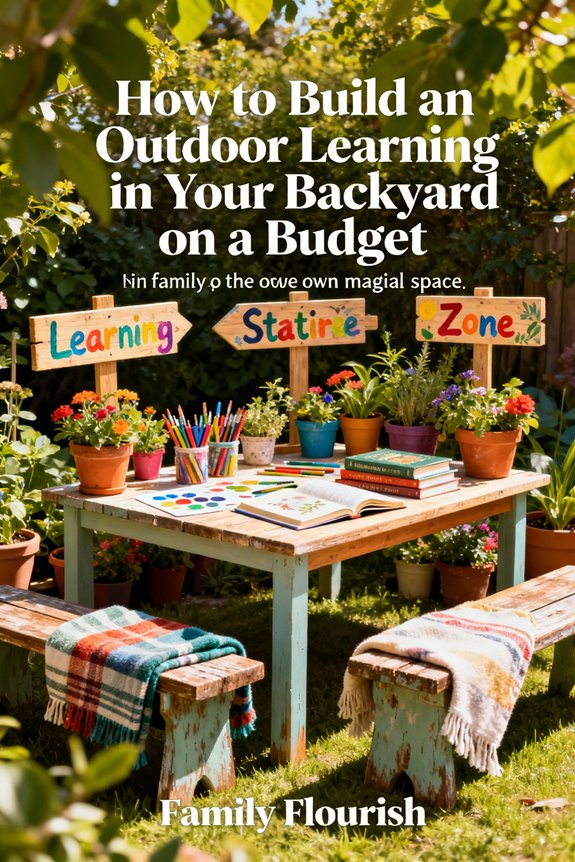

Start by walking your backyard to identify perfect spots for different activities—quiet observation corners, active exploration zones, and nature art areas. Gather free materials from your garage, community swaps, and local businesses like plastic containers, old pallets, and scrap wood. Create weatherproof storage using repurposed bins and shelving under tree canopies. Set up hands-on stations for sensory gardens, water play, and natural collections using items you already own. This guide will show you exactly how to optimize every corner for under $50.
Key Takeaways
- Assess your outdoor space and designate distinct learning zones for art, nature exploration, quiet study, and active learning activities.
- Source free materials from garages, community swaps, construction sites, and local businesses to minimize costs while maximizing resources.
- Create weatherproof storage using repurposed plastic containers, pallets, and treated lumber with protective covers for outdoor durability.
- Set up hands-on activity areas including sensory gardens, tinkering stations, water exploration zones, and nature art corners.
- Establish a maintenance schedule to check for wear, refresh materials, and expand activities based on children's engagement patterns.
Assess Your Space and Define Learning Zones
Get the latest insights delivered straight to your inbox.

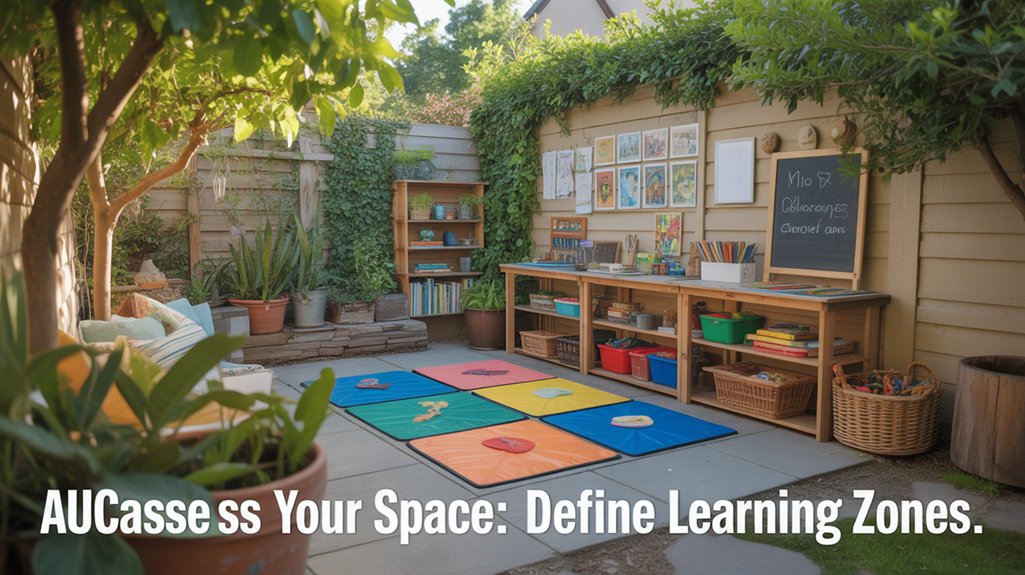
Before you start gathering materials or sketching designs, take a thorough walk around your outdoor area to understand what you're working with. Notice sunny spots perfect for science observations, shaded areas ideal for reading nooks, and flat surfaces suitable for hands-on activities.
Effective space planning means maximizing what you already have while creating distinct learning opportunities.
Smart outdoor learning design transforms everyday spaces into purposeful educational zones without requiring expensive materials or elaborate construction.
Divide your yard into purposeful sections based on zone functionality. Consider designating areas for art projects, nature exploration, quiet study, and active learning games. You don't need fancy equipment—a tree stump becomes a counting station, while a cleared patch converts into an outdoor writing space.
Sketch a simple map marking potential zones, keeping children's ages and interests in mind. Think about traffic flow and supervision needs.
This intentional approach guarantees every corner serves young learners meaningfully. Your thoughtful planning creates an enriching environment where children can explore, discover, and grow. Remember that the first three years are crucial for development, so creating spaces that support early childhood development through outdoor exploration can have lasting benefits for your child's growth.
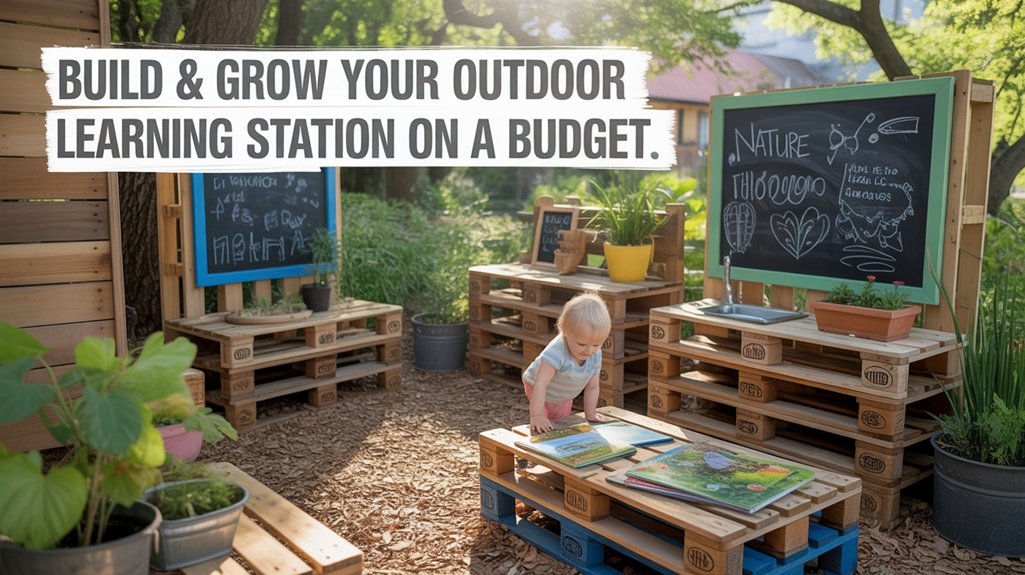
Source Free and Low-Cost Materials for Your Station
Everything you need to build an amazing outdoor learning station is likely hiding in plain sight around your home and community.
Start by checking your garage, basement, and storage areas for unused items that can serve educational purposes. Old planters become garden beds, wooden crates convert into book storage, and spare lumber creates seating areas.
Next, explore community swaps and local classifieds where families often give away materials perfect for outdoor learning spaces:
- Weathered pallets for building platforms and vertical gardens
- Chalkboards and whiteboards retired from classrooms
- Plastic containers and bins for organizing supplies and collecting nature specimens
Don't overlook neighborhood social media groups where parents frequently offer free educational materials.
Visit construction sites and ask about scrap wood they're discarding. Check with local businesses for donated items like fabric remnants for shade structures or PVC pipes for building projects.
These resourceful approaches stretch your budget while creating meaningful learning experiences. When designing your outdoor space, consider how time in nature can support healthy, active living for children by helping them overcome obstacles to physical activity and overall wellbeing.
Create Hands-On Activity Areas That Inspire Discovery
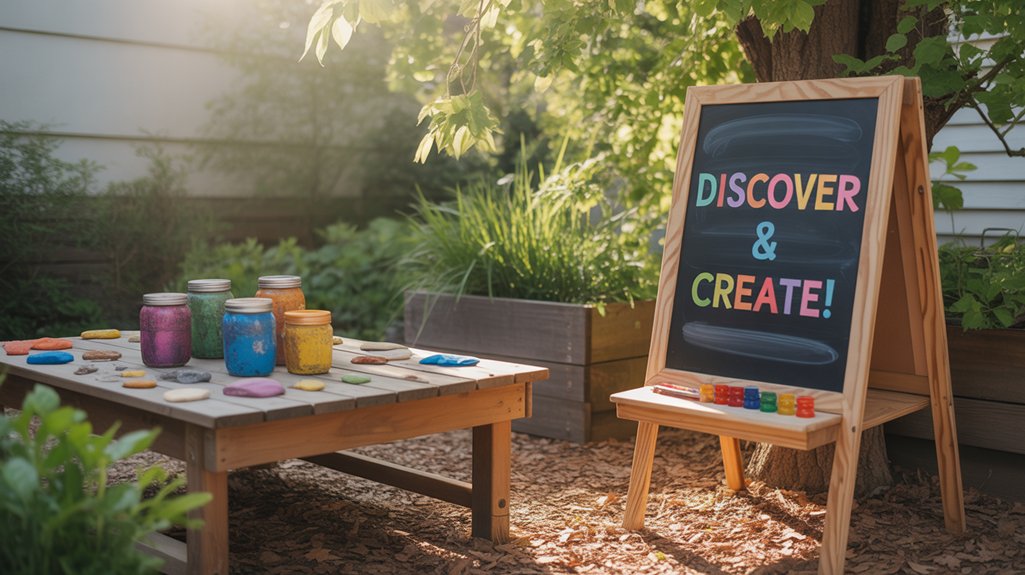
While materials form the foundation of your outdoor station, the activity zones you design will spark genuine curiosity and sustained engagement.
Create dedicated spaces that encourage exploratory play through purposeful design. Set up a sensory garden where children can touch fuzzy lamb's ear, smell fragrant herbs, and observe pollinator activity.
Designate a tinkering area with collected natural objects—pinecones, smooth stones, seed pods—that young learners can sort, stack, and arrange.
Build sensory experiences into a water exploration zone using recycled containers for pouring and measuring.
Add a nature art station with sticks, leaves, and mud for creative expression.
Consider including a quiet observation corner with magnifying glasses and nature journals where children can sketch discoveries.
You're not just building activity areas; you're crafting opportunities for wonder. Each zone should invite investigation while allowing flexibility for children's imagination to guide their learning journey.
Design Weather-Resistant Storage Solutions
Protecting your outdoor learning materials from rain, wind, and sun doesn't have to drain your budget!
You'll want to explore creative storage options like repurposed plastic containers, build simple waterproof shelving units from affordable materials, and use protective covers to extend the life of your supplies.
Let's look at practical ways to keep everything organized and ready for learning, no matter what Mother Nature throws your way.
Repurposed Plastic Container Ideas
Large plastic containers destined for recycling bins can become your outdoor learning station's best storage allies.
You'll convert everyday items into functional pieces that help children explore nature while protecting supplies from the elements.
Consider these practical applications:
- Laundry detergent jugs – Cut openings to create weather-proof bins for sidewalk chalk, bubbles, and outdoor toys
- Food storage containers – Stack them to organize art supplies, nature journals, and magnifying glasses while keeping everything dry
- Ice cream buckets – Alter these into creative planters where kids can grow vegetables and flowers, learning plant life cycles firsthand
These repurposed containers cost nothing yet provide durable storage that withstands rain and sun.
You're not just saving money—you're modeling environmental stewardship and resourcefulness for the children you serve.
DIY Waterproof Shelving Units
Now that you've gathered your storage containers, you'll need a sturdy framework to keep them organized and accessible. Building waterproof shelving units doesn't require expensive materials—you can create durable storage using repurposed pallets, cinder blocks, or treated lumber.
| Shelving Materials | Waterproof Finishes |
|---|---|
| Wooden pallets | Marine-grade sealant |
| Cinder blocks | Outdoor polyurethane |
| Treated lumber | Waterproof deck stain |
| PVC pipes | Silicone-based coating |
Start by selecting weather-resistant shelving materials that'll withstand rain and sun exposure. Apply two coats of waterproof finishes to wooden surfaces, allowing proper drying time between applications. Position your shelves under an overhang or tree canopy for extra protection. Stack cinder blocks for adjustable height options, or secure wooden planks with brackets. Your students will appreciate having well-organized learning materials readily available outdoors!
Protective Covers and Tarps
Even the sturdiest shelving units need an extra layer of defense against harsh weather conditions.
You'll want to select protective materials that shield your learning station's supplies while remaining budget-friendly. Understanding different tarp types helps you make smart choices for your students' outdoor classroom.
Consider these affordable protective options:
- Heavy-duty polyethylene tarps offer waterproof coverage and UV resistance at hardware stores for under $20
- Clear vinyl sheeting protects materials while maintaining visibility, perfect for showcasing nature collections or student projects
- Breathable canvas covers prevent moisture buildup that causes mildew on books and paper supplies
Secure your covers with bungee cords or grommets to withstand wind.
You're creating a lasting learning environment that'll serve children through every season!
Incorporate Nature-Based Learning Elements
You'll want to create dedicated spaces where students can collect, organize, and showcase their nature finds like leaves, rocks, and pinecones.
Set up simple observation zones with native plants, herbs, or flowers that kids can watch grow and change throughout the seasons.
These hands-on elements convert your outdoor station into a living laboratory where learning happens naturally through direct interaction with the environment.
Natural Collection and Display
Since children learn best through hands-on exploration, creating dedicated spaces for natural collections converts your outdoor station into a living classroom.
You'll enable young learners by designating areas where they can display and examine natural artifacts they discover during their outdoor adventures.
Set up simple collection stations using repurposed materials:
- Sorting trays from egg cartons – Perfect for organizing pinecones, acorns, interesting rocks, and seed pods by size or type
- Shadow boxes from old picture frames – Mount pressed leaves, flower petals, and bark samples for ongoing sensory exploration
- Mason jar observation centers – Display feathers, shells, and seasonal treasures at eye level for close examination
These thoughtful displays encourage children to observe, categorize, and appreciate nature's details while developing scientific thinking skills that'll serve them throughout their educational journey.
Living Plant Observation Areas
When plants become permanent fixtures in your outdoor learning station, they change static spaces into vibrant laboratories where children witness life cycles firsthand.
You'll create meaningful experiences by designating specific areas where young learners can track growth patterns and document observations throughout the year.
Start with easy-to-grow perennials like sunflowers, strawberries, or herbs. Label each specimen with simple markers, encouraging plant identification skills while building scientific vocabulary.
Position plants at child-friendly heights where students can measure stems, count leaves, and sketch changes.
Dedicate sections for observing seasonal changes—watching bulbs emerge in spring, flowers bloom in summer, seeds form in fall, and plants rest in winter.
You're promoting environmental stewardship while teaching patience and careful observation. These living displays cost minimal money but deliver maximum educational impact.
Maintain and Expand Your Outdoor Learning Station Over Time
Recommended for You
🛒 Camping Gear Family
nofollow sponsored noopenernofollow sponsored noopenerCheck Price on Amazon →As an Amazon Associate we earn from qualifying purchases.
As your outdoor learning station takes shape and students begin using it regularly, you'll want to create a simple maintenance schedule that keeps everything functional and inviting.
Check weekly for wear and tear, refresh materials, and clean surfaces to guarantee safe, engaging experiences for every learner.
Think strategically about expanding activities as you observe what captivates students most. Budget-friendly additions might include:
- A mud kitchen or water exploration table using repurposed containers and utensils from thrift stores
- Seasonal adjustments like winter bird feeding stations or spring butterfly gardens that align with natural cycles
- Musical instruments crafted from recycled materials such as rain sticks from cardboard tubes or drums from coffee cans
Document what works well through photos and notes. This helps you replicate successful setups and share ideas with other educators.
Involve students in maintenance tasks too—they'll develop ownership and responsibility while learning practical life skills that serve them beyond the classroom.
Frequently Asked Questions
What Age Groups Are Best Suited for Outdoor Learning Stations?
You'll find outdoor learning stations work wonderfully for all ages!
They're perfect for preschool activities like sensory exploration and nature discovery.
Elementary kids thrive with hands-on experiments and creative projects.
Even teen engagement flourishes when you incorporate challenging STEM activities, gardening responsibilities, or outdoor art spaces.
The beauty is that you can adapt your station's complexity to match any developmental stage.
You're creating an inclusive space where children of all ages can explore, learn, and grow together in nature's classroom!
Do I Need Permission From My Homeowners Association Before Building?
Yes, you'll want to check your homeowner guidelines first!
Most HOAs have specific rules about outdoor structures that could affect your learning station plans.
Contact your association before starting construction to avoid potential fines or required removals.
You should also verify if you need building permits from your local municipality.
Taking these steps upfront guarantees you're creating a safe, compliant space where children can thrive and learn outdoors for years to come!
How Do I Prevent Mosquitoes and Pests in the Learning Area?
You'll want to use natural repellents like citronella plants, lavender, and lemongrass around your learning station—they're safe for kids and effective!
Set up pest traps away from the main area to catch mosquitoes before they bother your students.
Consider adding a small fan too, since mosquitoes can't fly well in moving air.
These budget-friendly solutions keep everyone comfortable while they're exploring and learning outdoors together!
Can Outdoor Learning Stations Increase My Home's Property Value?
Picture real estate agents weeping with joy at your “educational gazebo”—yes, outdoor learning stations can boost property value!
While it won't match a kitchen remodel, thoughtfully designed outdoor features appeal to family-focused buyers. You're creating a unique selling point that showcases your yard's potential.
Keep it well-maintained and aesthetically pleasing. Remember, you're not just adding value to your home; you're investing in children's futures while potentially increasing your property's marketability!
What Insurance Considerations Should I Know About for Outdoor Learning Spaces?
You'll want to contact your homeowner's insurance provider to guarantee your liability coverage extends to your outdoor learning space.
They'll help you understand what's needed to protect both your family and visiting learners.
Make certain you're following local safety regulations for playground equipment, fencing, and supervision requirements.
It's worth documenting your safety measures and maintaining proper supervision policies.
This protects everyone while you're creating meaningful educational experiences for children in your community!
Conclusion
Think of your backyard learning station as a garden itself—you've planted the seeds of curiosity, fostered spaces for growth, and created fertile ground for discovery. Now watch as young minds bloom! You'll find that this humble outdoor classroom becomes more vibrant with each season. Keep nurturing it with new ideas, tend to its needs, and celebrate every “aha!” moment that sprouts. Your budget-friendly investment will yield the richest harvest: children who love learning naturally.
Related Articles
- The Ultimate Guide to Sibling Conflict
- The Ultimate Guide to Family Meal Planning
- The Ultimate Guide to Kids Educational Games
- 20 Fun DIY Crafts to Strengthen Family Bonds
- The Ultimate Guide to Screen Time Management

Written by Sarah Mitchell, M.S., CFLE
Founder & Lead Editor
Sarah is a Certified Family Life Educator with a Master's degree in Human Development and Family Studies from the University of Missouri. With 15+ years of experience as a parent educator and mother of three, she brings both professional expertise and real-world parenting wisdom to every article.
Credentials: M.S. in Human Development and Family Studies, Certified Family Life Educator (CFLE)
📚 Explore More on This Topic
Editor's Pick: Sturdy outdoor bookshelf with clear weatherproof cover for budget backyard learning station books.
Your Weekly Dose of Inspiration
Journaling ideas, family tips, and gentle inspiration.

