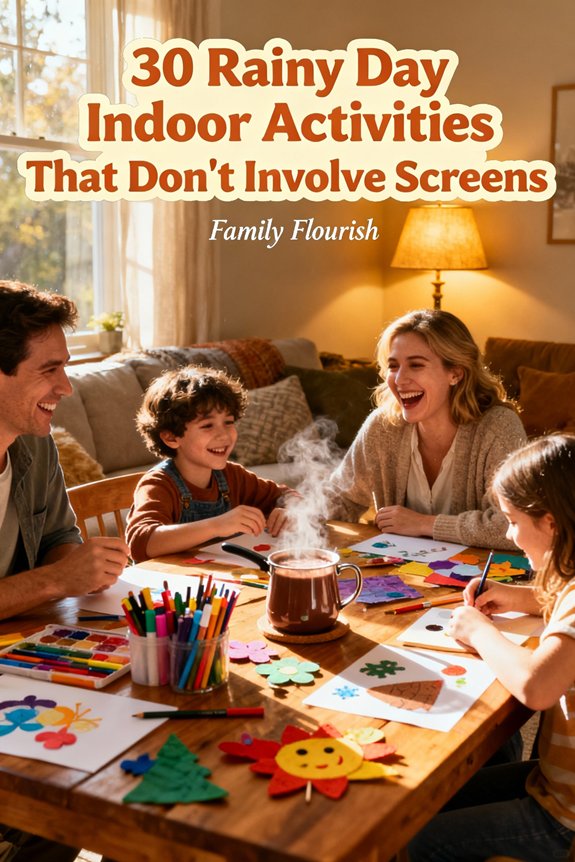

You'll find endless possibilities for screen-free fun on rainy days. Convert your living room into an adventure zone with blanket forts, obstacle courses, and indoor camping setups. Get creative with art galleries, friendship bracelets, and slime-making sessions. Host dance parties, treasure hunts, and fashion shows that'll have everyone laughing together. Don't forget classic board games, science experiments, and paper airplane competitions that spark imagination. These simple activities use everyday household items to create memories that last far beyond the rainy afternoon, and there's so much more you can discover to keep your family entertained.
Key Takeaways
- Build blanket forts with themed decorations, fairy lights, and cozy hideaways using household items like sheets and cushions.
- Host dance parties, play classic board games, or organize charades tournaments for interactive family entertainment without screens.
- Create science experiment stations with volcano kits, crystal growing, and density exploration using common household materials.
- Plan indoor treasure hunts with themed maps, hidden clues, riddles, and physical challenges for adventurous family teamwork.
- Set up art galleries, craft friendship bracelets, or organize fashion shows to encourage creativity and self-expression indoors.
Build an Epic Blanket Fort
When rain taps against the windows and outdoor play isn't an option, altering your living room into a cozy fortress becomes the perfect adventure. Gather blanket materials like sheets, quilts, and cushions to construct sturdy walls.

You'll create secret hideaways by draping fabric over furniture, securing edges with heavy books. Choose fort themes together—perhaps a castle, spaceship, or jungle expedition. Design creative entrances using pillows as stepping stones or fabric flaps as doorways.
Add cozy decorations like stuffed animals and favorite books inside. For lighting ideas, string battery-operated fairy lights or use flashlights to create a warm glow. These safe options eliminate fire hazards while maintaining ambiance.
Battery-operated lights and flashlights transform your fortress into a magical sanctuary while keeping little adventurers safe from fire hazards.
Encourage children to develop imaginative stories within their fortress. They'll craft tales of brave knights or space explorers, building confidence through play.
You're not just supervising construction; you're helping create family memories that last far beyond the rainy afternoon, nurturing creativity and togeness. Remember that these family activities strengthen bonds between parents and children while providing enriching alternatives to screen time.
Host a Living Room Dance Party
Turn up the volume and change your living room into the ultimate dance floor!
You'll want to create an energizing playlist with everyone's favorite songs, mixing upbeat pop hits with silly kids' tunes that get everyone moving.
Add excitement by incorporating fun dance games like freeze dance or follow-the-leader, where you can show off your wildest (but safe!) moves without worrying about bumping into furniture.
Create the Perfect Playlist
Nothing changes an ordinary afternoon into an epic celebration quite like the right music. You'll want to blend music genres that accommodate everyone's tastes while keeping energy levels high.
Start by gathering family favorites and classic hits that span generations—everyone deserves their moment to shine. Mix upbeat tunes with party anthems to maintain momentum, then sprinkle in nostalgic songs that spark shared memories.
Consider song lyrics carefully if young children will participate, opting for instrumental tracks when needed. Themed playlists work wonderfully for creating specific mood settings, whether you're channeling disco fever or beach party vibes.
Invite each family member to contribute three songs. This inclusive approach guarantees everyone feels valued and invested in your living room celebration.
Add Fun Dance Games
Your playlist is ready, and now it's time to get everyone moving with structured games that convert simple dancing into memorable competition.
Start with freeze dance, where participants must stop immediately when the music pauses. Add a follow leader challenge where everyone mimics one person's silly walks and movements.
Set up musical chairs or try a limbo challenge using a broom handle. Host a dance off where each person showcases their best moves while others cheer them on.
Include a balloon pop rhythm game where dancers must keep balloons airborne while moving. Create a dance relay with different movement stations.
These activities keep children active, engaged, and laughing together while building coordination and confidence in a safe, screen-free environment.
Create a Home Scavenger Hunt
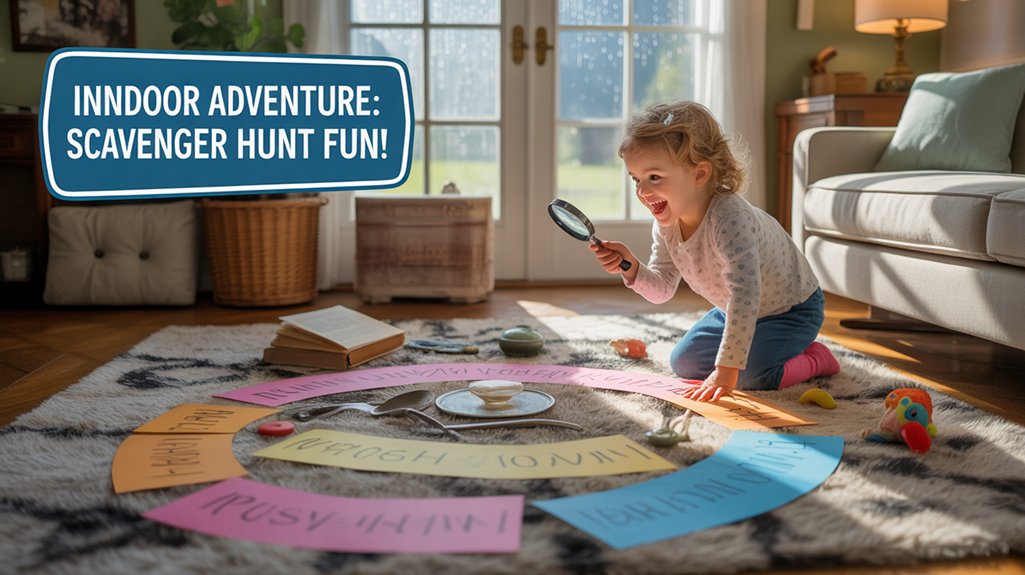
A home scavenger hunt converts an ordinary rainy afternoon into an exciting indoor adventure that'll keep kids engaged for hours.
You'll create meaningful memories while helping children develop problem-solving skills and attention to detail.
Start with age-appropriate scavenger hunt ideas that match your children's abilities. For younger kids, use picture-based clues showing items they'll recognize. Older children can handle riddles or written directions that challenge their thinking.
Tailor your scavenger hunt complexity to your child's age—pictures for toddlers, riddles and written clues for older kids.
Your item list suggestions should include safe, accessible objects: something soft, a favorite book, three different colored socks, or a toy that starts with “B.” Add creative categories like “find something that makes you smile” to encourage emotional connection.
Consider themed hunts around colors, shapes, or seasonal items. You can also incorporate learning objectives by including items that teach counting, letters, or science concepts.
Set clear boundaries about which rooms are off-limits, and always supervise to guarantee safety throughout the activity.
These engaging activities also help children with learning disorders by providing structured, hands-on experiences that support their unique educational and developmental needs.
Set Up an Indoor Obstacle Course
While scavenger hunts spark mental excitement, physical activity becomes equally important when kids are cooped up indoors. Alter your living space into an adventure course that channels their boundless energy constructively.
Start by establishing clear safety rules: no jumping on furniture, maintain soft landings, and always supervise younger children. Use cushions, pillows, tape lines, and household items to design challenges. Create stations where kids crawl under tables, hop between taped spots, balance along a rope laid on the floor, or weave through chair obstacles.
Obstacle creativity flourishes when you involve the children in designing their course. They'll suggest modifications and adjust difficulty levels, building problem-solving skills alongside physical strength. Rotate through different layouts to maintain engagement throughout the day.
This activity serves multiple developmental needs simultaneously—gross motor skills, spatial awareness, and following instructions. You're not just filling time; you're nurturing capable, active children while keeping everyone safe and entertained.
Start a Family Art Gallery
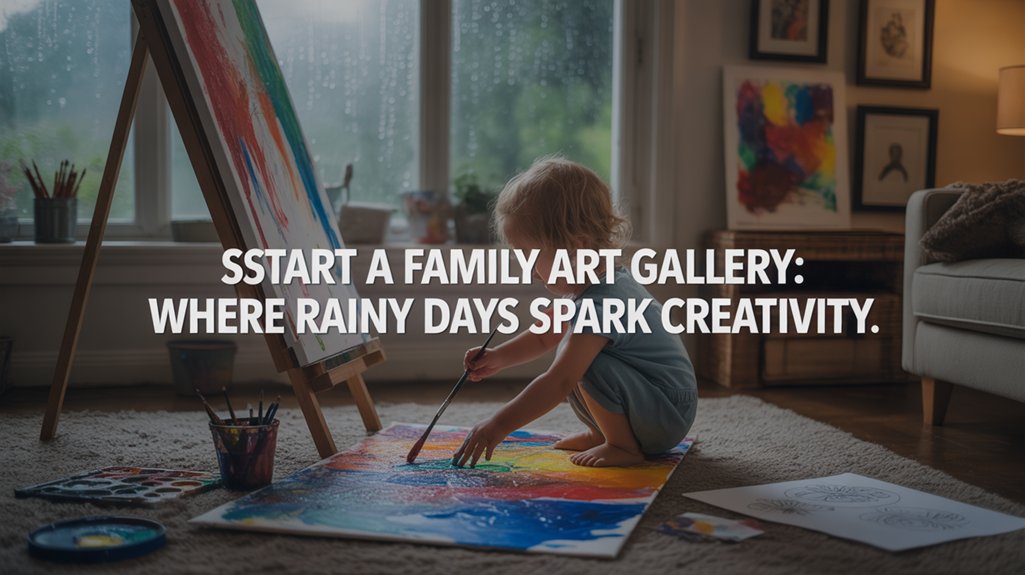
When physical energy runs low, channel your children's creativity into a meaningful art project that converts your home into a personalized museum.
Begin with theme selection—perhaps family portraits, nature scenes, or mixed art styles that let each child explore their preferences.
Gather art materials like watercolors, construction paper, and markers, ensuring they're age-appropriate and non-toxic.
Through creative collaboration, assign roles: some create artwork while others plan the gallery layout and display techniques. Older children can write artist statements explaining their inspiration.
Designate a hallway or living room wall as your exhibition space. Use painter's tape to avoid damage, and arrange pieces at varying heights so everyone can appreciate them.
Schedule an exhibition opening where family members present their work, explaining their creative choices.
Hold feedback sessions where you celebrate each artist's unique contributions. This activity nurtures self-expression while teaching children how their creativity can bring joy to others.
Bake and Decorate Cookies Together
Baking cookies converts a rainy afternoon into a delicious learning adventure that'll have your kids measuring, mixing, and decorating alongside you.
You'll want to pick easy recipes with just a few ingredients, then set up a safe decorating station with colorful frostings and sprinkles at kid-friendly heights.
Turn this tasty activity into a mini lesson by having your children practice counting chocolate chips, identifying shapes with cookie cutters, or learning basic kitchen safety rules.
Choose Simple Cookie Recipes
Since young children have shorter attention spans and less developed fine motor skills, selecting uncomplicated cookie recipes sets everyone up for success.
Look for family favorites with easy ingredients you'll already have on hand—basic sugar cookies or simple shortbread work beautifully. These recipes create sturdy bases perfect for fun shapes using cookie cutters.
Consider flavor combinations that appeal to your kids while keeping preparations straightforward. Single-bowl recipes minimize cleanup and maintain momentum.
Choose themed cookies based on seasons or holidays to spark excitement during cookie decorating time.
For baking tips, remember that rolled cookies should be thick enough for little hands to handle.
Simple icing techniques like spreading with butter knives or dipping cookie edges keep decorating accessible and enjoyable for everyone involved.
Set Up Decorating Station
Before the cookies come out of the oven, prepare your decorating station so little bakers can jump straight into the creative fun. Cover your table with washable material to protect surfaces and simplify cleanup.
Arrange bowls of frosting in various colors, ensuring they're cool enough for safe handling. Set out sprinkles, edible glitter, and mini chocolate chips in small containers.
Gather craft supplies like toothpicks for detail work and plastic knives for spreading. Place paper plates at each seat so children have their own workspace.
Consider age-appropriate decorating ideas: younger kids enjoy simple designs with colorful sprinkles, while older ones can create intricate patterns. Keep damp cloths nearby for quick cleanups.
This thoughtful preparation lets you focus on guiding children through their creative process.
Make It Educational Fun
While decorating cookies delights children, you can change this activity into valuable learning moments. Alter cookie decoration into educational games by asking younger kids to count sprinkles, identify colors, or create patterns.
Older children can practice fractions while measuring ingredients or calculating recipe modifications.
Encourage creative writing by having them invent stories about their cookie characters or write recipe cards with step-by-step instructions. They'll develop literacy skills while documenting their culinary creations.
Remember safety first: supervise oven use, teach proper hand-washing techniques, and explain why certain ingredients need careful handling.
You're not just making treats—you're building confidence, math skills, and reading comprehension. These moments create lasting memories while nurturing young minds through purposeful, hands-on experiences.
Have a Paper Airplane Competition
A paper airplane competition converts ordinary sheets of paper into exciting flying machines that'll keep everyone entertained for hours.
You'll want to gather paper, markers, and tape, then let each participant create their unique aircraft. Encourage kids to experiment with different paper airplane designs—from classic darts to wide-winged gliders.
They'll develop problem-solving skills while discovering which folds create the best aerodynamics.
Set up a launch line and designate a safe flying zone away from fragile items. You can measure flight distance using tape on the floor or simply mark where each plane lands.
Create categories like “longest flight,” “most creative design,” or “best loop-de-loop” so everyone wins something.
This activity teaches physics concepts like lift and drag while promoting healthy competition. You're helping children learn persistence as they adjust their designs after each flight.
Plus, it's completely free and uses materials you already have at home.
Play Classic Board Games
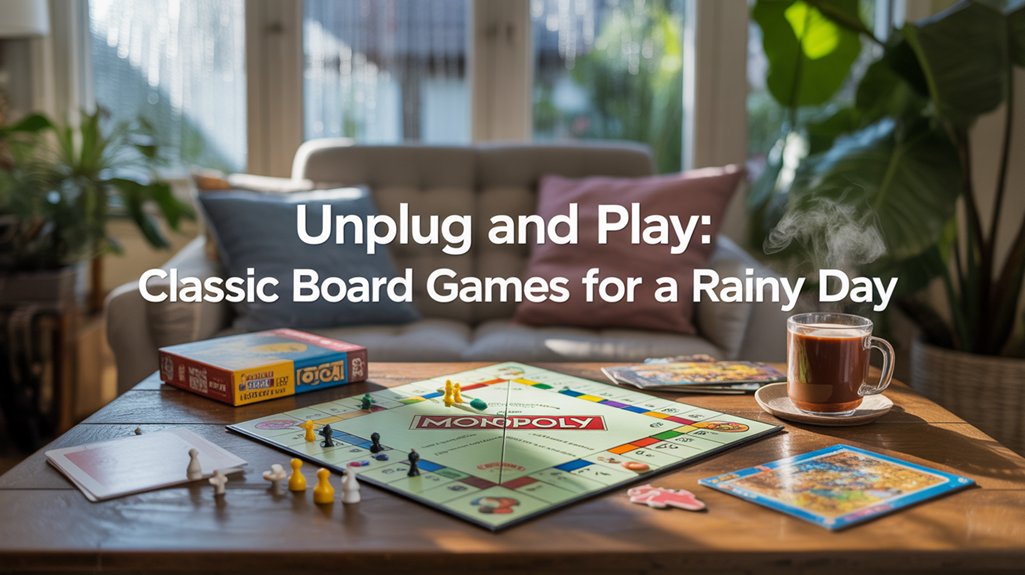
Board games offer endless entertainment when you're stuck indoors, but choosing the right ones makes all the difference.
You'll want to pick games that match everyone's ages and skill levels so nobody gets frustrated or bored.
Try setting up a tournament where players compete in different games throughout the day, keeping score to crown an ultimate board game champion by evening.
Age-Appropriate Game Selection
Choosing the right board game for your child's age guarantees everyone stays engaged and frustration-free during indoor play. Age appropriate games matched to developmental stages change ordinary afternoons into fun family activities while building essential skills.
For toddlers, select simple games with large pieces that prevent choking hazards.
Preschoolers thrive with interactive storytelling games and imaginative role play opportunities.
Elementary-aged children benefit from educational board games featuring various game difficulty levels that challenge without overwhelming.
Consider skill building games that develop counting, reading, or strategy.
Creative playtime options like cooperative games teach teamwork while competitive ones encourage healthy sportsmanship.
Check manufacturer age recommendations, but you'll know best what suits your child's unique abilities.
When everyone can participate meaningfully, these moments become cherished memories that strengthen family bonds.
Creating Tournament-Style Competition
Once you've found games that match your family's abilities, converting regular game nights into tournaments adds excitement and keeps everyone motivated through multiple rounds.
Design simple tournament rules that promote participation rather than perfection. Create game categories like strategy, word games, or quick challenges to showcase different strengths. Consider team strategies that pair younger children with older helpers, assigning participant roles that let everyone contribute meaningfully.
Choose competition formats suited to your group—single elimination rounds work for larger families, while round-robin scoring systems guarantee everyone plays multiple times.
Develop prize ideas focused on experiences rather than expensive rewards: winner picks tomorrow's dinner or chooses the next movie. Themed tournaments add creativity, altering ordinary gameplay into memorable family traditions that serve everyone's need for connection and fun.
Put on a Puppet Show
A puppet show changes your living room into a magical theater where imagination takes center stage. You'll help children develop performance skills while crafting puppet characters from simple puppet materials like socks, paper bags, or cardboard.
Guide them through puppet design basics, encouraging creativity in every detail. Introduce scriptwriting basics by brainstorming story themes together—adventure tales, funny scenarios, or heartwarming moments work wonderfully.
Shadow puppets offer an alternative approach using just a flashlight and wall space. Practice voice modulation to bring each character to life, making heroes sound brave and villains delightfully dramatic.
Encourage improvisation techniques when the script takes unexpected turns. Set up chairs for audience engagement, inviting family members to this special performance.
You're not just facilitating entertainment; you're nurturing confidence, communication skills, and creative expression. The living room couch becomes the perfect puppet stage with a draped blanket, altering rainy day boredom into theatrical magic.
Create Homemade Playdough
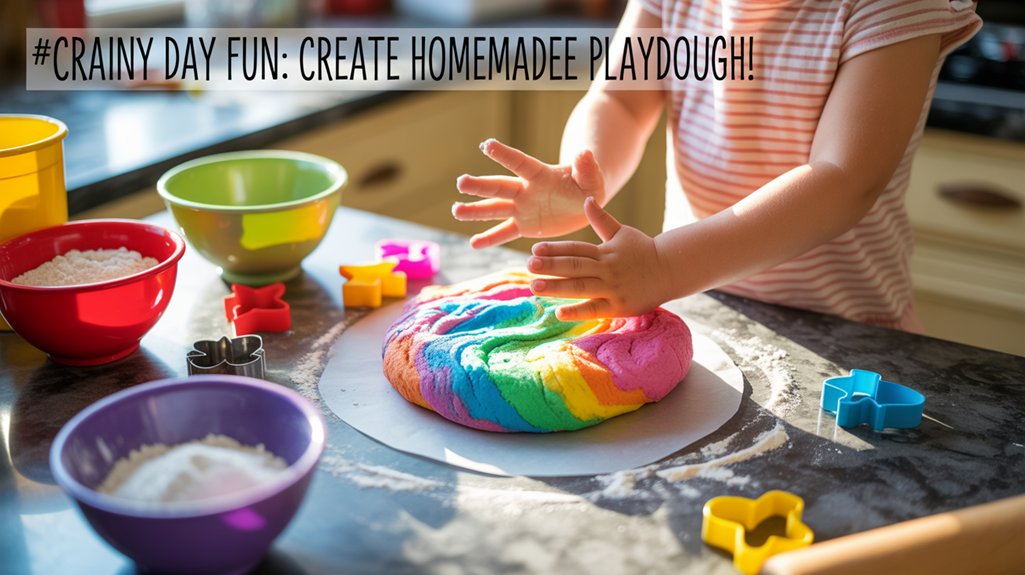
While store-bought playdough fills shelves everywhere, making your own batch at home offers sensory fun that's safer, cheaper, and surprisingly simple.
You'll create memorable moments while teaching kids valuable skills through family collaboration.
Basic recipe variations require just flour, salt, water, and oil. Customize playdough colors using food coloring or natural alternatives like turmeric and beet juice.
These dough textures provide sensory benefits that improve fine motor development and creativity.
Essential tips for playdough success:
- Experiment with themed playdough by adding scents like vanilla or peppermint for multi-sensory engagement.
- Gather homemade tools including cookie cutters, rolling pins, and household items to press fun shapes.
- Store in airtight containers to maintain freshness for weeks.
- Try creative recipes incorporating glitter, essential oils, or seasonal colors.
You're not just crafting play material—you're encouraging imagination and development.
Let children mix ingredients, knead dough, and explore endless possibilities while you guide their creative journey.
Organize a Treasure Hunt
When rain traps everyone indoors, converting your home into an adventure zone through a treasure hunt keeps kids engaged and active. Start by selecting adventure themes like pirates, detectives, or explorers that'll spark imagination.
Create a treasure map showing rooms as islands or mysterious locations, then plant hidden clues that lead participants from one spot to another.
Design creative challenges at each station—riddles, physical tasks, or puzzle pieces that combine into final directions. Set reasonable time limits to maintain excitement and urgency.
Encourage family teamwork by pairing younger children with older siblings or adults who can help decode clues safely.
For prize ideas, consider small toys, special snacks, or privilege coupons like “choose tonight's movie.”
This indoors excitement modifies ordinary spaces into extraordinary adventures while developing problem-solving skills. You're not just entertaining children—you're creating memorable experiences that strengthen family bonds during dreary weather.
Build With Cardboard Boxes
Building with cardboard boxes converts ordinary packaging into extraordinary playthings that'll keep kids entertained for hours.
You'll want to start by collecting various box sizes and safe crafting supplies like tape, markers, and child-safe scissors.
Once you've gathered your materials, you can construct amazing forts and castles, then personalize them with colorful decorations that bring your creations to life.
Gather Boxes and Supplies
Before you plunge into construction, you'll need to scout your home for the right materials. Check recycling bins, closets, and storage areas for boxes of varying sizes. Your craft supply organization system likely holds treasures perfect for this project.
Essential supplies to gather:
- Cardboard boxes – shoe boxes, shipping containers, cereal boxes, and appliance packaging in different dimensions
- Joining materials – painter's tape, child-safe glue, masking tape, and age-appropriate adhesives
- Cutting tools – safety scissors for kids and box cutters for adult supervision
- Decorating supplies – markers, crayons, paint, stickers, fabric scraps, and wrapping paper
Once you've assembled these materials, spread them across a designated workspace.
This preparation helps children develop planning skills while exploring box decoration ideas that'll change simple cardboard into extraordinary creations.
Castle and Fort Ideas
As your child's imagination takes flight, a simple cardboard box converts into a medieval fortress or secret hideaway. Guide them in castle building by cutting windows and doorways, then stacking boxes to create turrets. You'll strengthen their spatial reasoning while they design their masterpiece.
Fort decorating alters plain cardboard into personalized spaces. Help them paint stone patterns, attach fabric flags, or draw royal crests. Let siblings collaborate on shared kingdoms, promoting teamwork and communication skills.
Safety remains paramount—supervise cutting activities and secure stacked boxes with tape. Place blankets inside for comfortable flooring.
These creations provide hours of imaginative play, giving children ownership of their environment. You're not just building structures; you're nurturing creativity and confidence that'll serve them throughout life.
Decorate Your Creations
Once your cardboard structure stands complete, the real magic begins with decoration. Alter ordinary boxes into extraordinary spaces where children's imaginations soar.
You'll create meaningful experiences while helping kids develop creativity and fine motor skills.
Essential decorating supplies:
- Paint and markers – Let children choose colors that bring their vision to life, just like decorating cookies with personalized designs.
- Fabric scraps and ribbons – Add texture and dimension to walls and windows.
- Construction paper cutouts – Perfect for crafting decorations like flags, flowers, or window scenes.
- Natural materials – Incorporate leaves, pinecones, and twigs for eco-friendly embellishments.
Encourage children to personalize every detail. They'll gain confidence while developing artistic expression and problem-solving abilities through hands-on creation.
Have an Indoor Picnic
An indoor picnic converts your living room into a delightful dining adventure without worrying about weather or bugs. Spread a picnic blanket on the floor and involve everyone in preparing simple, safe finger foods like sandwiches, cut fruit, and crackers. You'll create memorable moments while teaching children about meal planning and cooperation.
Transform the experience into interactive food games that encourage participation. Try “guess the flavor” with blindfolded taste tests using safe, familiar foods, or create edible art by arranging colorful fruits and vegetables into patterns. These activities develop sensory awareness while making mealtime enjoyable.
Keep safety at the forefront by supervising younger children with small foods and ensuring everyone washes their hands before eating. You'll find that this simple activity promotes togetherness and communication skills.
Clean-up becomes part of the fun when everyone pitches in, teaching responsibility and teamwork. Your indoor picnic offers quality time that cultivates relationships and creates lasting family traditions.
Start a Science Experiment Station
After enjoying food-based fun, you can spark curiosity by setting up a dedicated space for hands-on scientific discovery. Change a corner of your kitchen or dining room into an experiment station where children can explore fundamental concepts safely.
This dedicated area keeps all materials organized and ready for spontaneous learning moments.
Essential supplies for your science experiments station:
- Volcano kit materials – baking soda, vinegar, food coloring, and containers for classic eruption demonstrations
- Crystal growing kits – salt, sugar, or borax solutions that create fascinating overnight formations
- Density exploration tools – various liquids like oil, water, and corn syrup to test which float or sink
- Magnet discovery set – different sized magnets with safe household items for attraction testing
These fun activities encourage children to ask questions, make predictions, and observe results.
You'll nurture critical thinking skills while keeping them productively engaged. Always supervise experiments and establish clear safety guidelines before beginning any activity.
Create DIY Musical Instruments
Changing everyday household items into homemade instruments lets children explore rhythm, pitch, and sound creation while developing fine motor skills.
You'll encourage musical creativity by helping kids convert rice-filled containers into shakers, rubber bands stretched over tissue boxes into guitars, and water-filled glasses into xylophones.
Guide children through instrument exploration by testing different materials and sounds together.
Empty oatmeal containers become drums, wooden spoons turn into drumsticks, and paper towel tubes create kazoos when you hum through wax paper secured at one end.
Transform ordinary kitchen and craft supplies into a makeshift orchestra with drums, kazoos, and percussion instruments using items you already have at home.
Ensure all materials are age-appropriate and supervise younger children closely, especially with small items like beans or buttons that pose choking hazards.
Once you've assembled several instruments, organize a family band where everyone plays their creation together.
This collaborative music-making builds confidence, encourages self-expression, and creates joyful memories while keeping active minds engaged on dreary days.
Play Charades or Pictionary
Moving from making music to making gestures, charades and Pictionary offer screen-free entertainment that sparks laughter and creativity across all age groups.
These classic games require minimal supplies—just paper, pencils, and imagination. They're perfect for families wanting to connect meaningfully while building communication skills together.
Essential charades strategies and pictionary tips:
- Create age-appropriate categories – Mix simple animals and actions for younger players with challenging movie titles or phrases for teens and adults, ensuring everyone participates confidently.
- Set clear time limits – Use a phone timer (then put it away!) to keep rounds moving at 60-90 seconds, maintaining energy and engagement.
- Establish house rules early – Clarify whether sounds, letters, or specific gestures are allowed before starting to prevent confusion and disputes.
- Form balanced teams – Pair experienced players with beginners, encouraging mentorship and ensuring no one feels left out or overwhelmed.
These games convert rainy afternoons into memorable bonding experiences while developing nonverbal communication and creative thinking skills.
Set Up a Home Bowling Alley
While charades engages the mind, home bowling gets everyone moving and laughing with an activity that changes any hallway or living room into an exciting alley. Start your lane setup by arranging homemade pins—empty water bottles work perfectly—at one end of your space.
You'll need a soft ball selection like rolled-up socks or foam balls to protect walls and furniture. Establish clear bowling rules before starting: mark a throwing line with tape and decide on your scoring system. Traditional ten-pin scoring works, or simplify it for younger participants.
Add creative decorations to modify your space—tape “lane lines” on the floor or create a scoreboard on poster board. Organize team competition to encourage cooperation and friendly rivalry.
Before playing, review safety measures: establish boundaries, verify the playing area is clear of obstacles, and remind everyone to wait their turn. This inclusive activity lets you create joyful memories while keeping everyone actively engaged.
Make Friendship Bracelets
Making friendship bracelets is a creative way to spend a rainy afternoon while crafting colorful gifts for the people you care about.
You'll need just a few simple materials like embroidery floss, scissors, and tape to get started, then you can learn basic knotting techniques that form the foundation of every design.
Once you've mastered the essential knots, you'll be ready to explore popular patterns like chevrons, stripes, and diamonds that'll make your bracelets stand out.
Materials You'll Need
Gathering your supplies is half the fun when you're getting ready to create colorful friendship bracelets. You'll find most of these craft supplies around your home or at any local store.
These creative tools change into beautiful gifts that'll brighten someone's day.
Essential materials include:
- Embroidery floss or yarn – Choose 3-6 colors in various shades to create vibrant patterns
- Scissors – Keep adult supervision nearby when younger crafters use sharp tools
- Tape or safety pins – Secure your work to a stable surface for easier braiding
- Measuring tape – Cut strands about 24 inches long for comfortable wrist-sized bracelets
These simple art essentials let you craft meaningful tokens of friendship.
You're not just making accessories; you're creating heartfelt gifts that show others they're valued and remembered.
Basic Knotting Techniques
Friendship bracelets start with two fundamental knots that you'll use repeatedly throughout your design. The forward knot involves taking the left strand over the right, pulling it through the loop, and tightening. For the backward knot, you'll reverse this motion.
Practice these knot tying basics on two contrasting colored strings until you've mastered consistent tension—this guarantees your bracelet looks neat and professional when you gift it.
These rope crafts require patience, so don't rush. Keep your work surface flat and secure the bracelet's top with tape to prevent tangling. Always supervise younger crafters with string materials.
Once you're comfortable with both knots, you'll be ready to create beautiful patterns that friends and family will treasure for years.
Popular Pattern Ideas
The chevron pattern stands as the perfect starting point for bracelet makers ready to move beyond basic knots.
You'll find these popular pattern ideas create meaningful gifts that friends and family will treasure.
Four Essential Patterns to Master:
- Chevron – V-shaped arrows that flow toward the center, teaching you color coordination and symmetry
- Candy Stripe – Diagonal lines that spiral around the bracelet, perfect for beginners evolving to patterns
- Diamond – Geometric shapes that showcase your growing skills while creating eye-catching designs
- Heart – Sweet symbols that express care and friendship through thoughtful craftsmanship
These unique design concepts allow you to create personalized gifts for loved ones in need of encouragement.
Each pattern builds confidence while keeping your hands busy on dreary afternoons.
Host a Fashion Show
Rainy days change living rooms into perfect runways where kids can release their creativity and confidence.
Set up a designated backstage preparation area where children can plan their outfit challenges and coordinate costume changes. Create a makeup station using child-safe face paint and accessories for age-appropriate alterations.
Help them select runway music that matches their fashion themes, whether they're showcasing superhero costumes or elegant formal wear. Arrange themed accessories like scarves, hats, and jewelry to improve each look.
You'll become their encouraging audience, offering enthusiastic audience applause as they practice model poses down the runway.
Add simple lighting effects using lamps or flashlights to create spotlight moments. Consider recording performances so families can share the joy later.
This activity builds self-expression and public speaking skills while keeping children active. You're nurturing their imagination and helping them develop confidence that extends beyond rainy afternoons.
Build With LEGO or Building Blocks
Building blocks convert scattered pieces into architectural masterpieces that'll keep children engaged for hours.
Simple plastic bricks unlock endless creative potential, transforming idle moments into purposeful construction adventures that challenge young minds.
You'll cultivate imaginative play while developing fine motor skills and spatial reasoning through these creative structures.
Transform rainy afternoons into collaborative projects by introducing LEGO challenges that inspire young builders:
- Create a miniature city – Assign each child a building type (homes, shops, parks) to construct their neighborhood section, encouraging teamwork and architectural designs.
- Launch building competitions – Set timed challenges with specific themes like “tallest tower” or “strongest bridge” to spark friendly rivalry.
- Design themed builds – Choose story-driven builds based on favorite books or movies, letting children recreate scenes and expand narratives.
- Construct custom sets – Encourage children to design original creations, then photograph and write building instructions for others to follow.
These activities nurture problem-solving abilities while providing meaningful engagement that serves children's developmental needs beyond screen time.
Create Shadow Puppets
Shadow puppets convert any room into a magical theater with just a flashlight and your hands.
You'll start by setting up a simple stage using a blank wall and light source, then learn basic hand shapes like birds, dogs, and rabbits.
Once you've mastered the basics, you can work together to create exciting story adventures that bring your puppet characters to life.
Setting Up Your Stage
Change any doorway or wall space into a magical puppet theater with just a few simple materials. Your stage setup alters ordinary spaces into entertainment venues where you'll delight younger siblings or visiting friends.
Essential Elements for Your Shadow Puppet Stage:
- Lighting Effects – Position a bright lamp 3-4 feet behind a white sheet to create crisp shadows.
- Audience Seating – Arrange cushions or chairs facing the sheet, ensuring everyone's safety and clear sightlines.
- Stage Management – Designate a backstage area behind the sheet where puppeteers can safely move during scene changes.
- Sound Effects – Gather simple instruments or household items to improve your performance.
Before showtime, run through your rehearsal schedule to perfect timing and prop creation.
These performance tips help you serve your audience with confidence and creativity.
Basic Hand Shapes Tutorial
With your stage ready, you're prepared to learn the hand positions that bring characters to life. Start with simple hand shapes that children can easily master.
The classic dog requires your pointer finger up for the ear while your thumb extends forward for the snout. For a butterfly, hook your thumbs together and fan out your fingers, gently fluttering them. A bird needs your hands crossed at the wrists with fingers spread as wings.
Practice these finger patterns slowly, checking your shadows on the sheet. Once you've mastered basic forms, teach them to younger siblings or neighbors who'll delight in creating their own puppet shows.
Creating Story Adventures Together
Once you've practiced the basic shapes, gather your family to invent stories that'll convert simple shadows into exciting adventures.
Use story prompts to spark imaginative storytelling while building narrative skills together. This collaborative writing experience teaches character development and plot twists naturally.
Essential storytelling techniques for shadow puppet adventures:
- Story mapping – Outline beginning, middle, and end before starting your performance.
- Adventure settings – Alter your wall into forests, castles, or underwater worlds using colored lights.
- Role playing scenarios – Assign each family member different characters to develop throughout the tale.
- Narrative building – Layer unexpected plot twists that surprise your audience and keep everyone engaged.
You'll create meaningful connections while serving your children's creativity and confidence through these enriching activities.
Have a Storytelling Circle
A storytelling circle alters any rainy afternoon into an imaginative adventure without requiring screens or expensive materials. Gather everyone in a comfortable space where each person contributes to an evolving tale, practicing improvisation techniques that build confidence and creativity.
You'll strengthen character development by encouraging storytellers to give their heroes unique voices through voice modulation. Introduce unexpected plot twists that keep audience engagement high and imaginations active. Guide younger participants by suggesting storytelling themes like bravery, friendship, or problem-solving.
Mix narrative styles between personal anecdotes and adapted folktale origins to create variety. Simple storytelling props—a blanket becomes a magic carpet, a wooden spoon converts into a wizard's staff—enhance the experience without breaking your budget.
This activity serves children's developmental needs by building listening skills, emotional intelligence, and verbal expression. You're creating meaningful connections while teaching valuable communication abilities that benefit them throughout life, all while keeping everyone entertained during dreary weather.
Make Homemade Bird Feeders
Making bird feeders is a perfect rainy day project that lets you help your feathered friends while staying dry indoors.
You'll love the simple pinecone feeder design—it's easy to make and requires just a few supplies you probably already have at home.
Before you start, it's important to know which ingredients are safe for birds, so you can create treats that are both delicious and healthy for your backyard visitors.
Simple Pinecone Feeder Design
Your child can convert an ordinary pinecone into a delightful bird feeder with just three simple ingredients. This pinecone feeder creates opportunities for meaningful birdwatching activity while teaching compassion for wildlife.
Materials and Steps:
- Coat the pinecone – Spread peanut butter thoroughly into all crevices using a butter knife or spoon.
- Roll in birdseed – Press the coated pinecone firmly into a plate of mixed birdseed until completely covered.
- Attach string – Tie sturdy twine around the top scales to create a hanging loop.
- Display outdoors – Hang from tree branches visible from your window for ideal viewing.
This simple craft provides nourishment for local birds while giving your child the joy of serving creatures in need.
They'll develop patience and observation skills watching feathered visitors enjoy their handmade gift.
Safe Ingredients for Birds
When creating bird feeders with your child, selecting the right ingredients protects our feathered friends from harm. Choose safe seeds like sunflower, millet, and nyjer that provide nutritious snacks for various species.
Bird friendly fruits such as apples, berries, and raisins make excellent bird safe treats when cut into appropriate sizes.
Follow feeding guidelines by avoiding chocolate, salt, and processed foods that compromise bird health. Natural ingredients work best for attracting birds while keeping them healthy. You'll teach your children compassion while serving local wildlife.
Consider placing feeders near safe plants and natural birdbaths to create a complete sanctuary. This thoughtful approach to homemade birdhouses and feeding stations demonstrates stewardship of nature.
Your family's careful ingredient selection guarantees visiting birds receive only beneficial, wholesome food.
Play Hide and Seek
Hide and seek alters any home into an exciting playground where giggles and squeals of delight echo through hallways and rooms. This timeless game strengthens problem-solving skills while keeping children active and engaged.
Transform your space with these creative hiding spots and team strategy tips:
- Behind curtains or furniture – Encourage younger children to discover spots that keep them visible while building confidence in the game's concept.
- Inside walk-in closets – Remove any safety hazards first, ensuring doors can't lock accidentally and paths remain clear for quick exits.
- Under tables with tablecloths – Perfect for little ones who need reassurance they're not too far from family members.
- Team hiding variations – Partner older children with younger siblings, teaching cooperation and patience while ensuring everyone feels included and secure.
Set clear boundaries about off-limit areas, like kitchens or bathrooms, to maintain safety throughout the game.
Rotate seekers regularly so everyone experiences both roles.
Create Paper Crafts and Origami
While rain patters against the windows, paper crafts and origami offer a perfect opportunity to develop fine motor skills and spark creativity with nothing more than sheets of paper and imagination. You'll find paper folding alters simple materials into origami animals, festive decorations, and artistic expression that brightens any room.
| Skill Level | Project Ideas | Benefits |
|---|---|---|
| Beginner | Paper chains, simple boats | Builds confidence, learns basic folds |
| Intermediate | Origami animals, greeting cards | Develops patience, improves concentration |
| Advanced | Complex cranes, festive decorations | Masters precision, creates family projects |
| All Ages | Colorful patterns, bookmarks | Encourages teamwork, minimal craft supplies |
| Group Activity | Paper garlands, creative designs | Strengthens bonds, serves community needs |
Keep safety scissors handy for younger participants, and organize craft supplies beforehand. These family projects create meaningful gifts for nursing homes, hospitals, or neighbors who'd appreciate handmade treasures during dreary weather.
Start a Puzzle Marathon
Rainy afternoons change into exciting challenges when you spread out a jigsaw puzzle across your dining table and commit to completing it together.
You'll discover that puzzle strategies like sorting edge pieces first and grouping by color convert frustration into accomplishment. Choose puzzle themes that match your family's interests—wildlife scenes teach children about nature while city skylines spark geography discussions.
Essential Puzzle Marathon Tips:
- Select age-appropriate difficulty levels so younger helpers don't feel discouraged and everyone contributes meaningfully.
- Rotate puzzle themes regularly to maintain enthusiasm and expose children to diverse subjects.
- Create comfortable workspace stations with proper lighting to protect developing eyes during extended sessions.
- Establish turn-taking systems that guarantee each person places pieces and experiences success.
You're building more than pictures—you're developing patience, spatial reasoning, and collaborative problem-solving skills.
Keep completed puzzles as visual reminders of what your family achieves together through persistence and teamwork.
Play Indoor Camping
Who says you need sunshine and a backyard to go camping?
Change your living room into a cozy campsite where adventure awaits, rain or shine.
You'll create an unforgettable indoor expedition by setting up a blanket fort headquarters, sharing stories by “campfire,” and making delicious s'mores treats right in your kitchen.
Build a Blanket Fort
Changing your living room into a cozy fort is one of childhood's most magical experiences.
You'll create lasting memories while helping children develop spatial reasoning and teamwork skills. Gathering blanket fort essentials like sheets, pillows, and furniture transforms ordinary spaces into extraordinary hideaways.
Guide your little ones through imaginative themes—perhaps a castle, spaceship, or jungle expedition.
Here's what you'll need:
- Sturdy anchors: Use chairs, sofas, or tables as your fort's foundation
- Large blankets or sheets: Drape these over your structure for walls and ceiling
- Heavy books or clips: Fasten blankets safely without damaging furniture
- Cushions and pillows: Create comfortable seating inside
Always verify adequate ventilation and supervise younger children to prevent accidents.
Your thoughtful guidance makes fort-building both safe and magical.
Tell Campfire Stories Together
Once your fort stands complete, dim the lights and gather everyone for storytelling that'll spark imaginations. You can share age-appropriate ghost stories or spooky tales that thrill without frightening younger listeners.
Encourage family members to contribute personal anecdotes and favorite memories that celebrate your shared history. Family legends passed down through generations create meaningful connections between storytellers.
Guide children toward imaginative adventures featuring character creation, where they become heroes solving problems creatively. Weave in moral lessons naturally through your narratives, helping young ones explore values while entertained.
Take turns building collaborative stories where each person adds sentences. This inclusive approach guarantees everyone participates and feels valued.
Keep a flashlight handy for dramatic effect, and watch as your cozy fort changes into a magical storytelling sanctuary.
Prepare Indoor S'mores Snacks
Why settle for imaginary campfire treats when you can create the real thing safely in your kitchen? Indoor s'mores let you bring camping magic to rainy afternoons while serving delicious snacks to your family.
Safe Indoor S'mores Methods:
- Oven broiling – Place assembled s'mores on a baking sheet and broil for 30-60 seconds, watching carefully to prevent burning.
- Stovetop roasting – Hold marshmallows over a gas flame using long skewers with adult supervision.
- Microwave method – Sandwich s'mores ingredients between graham crackers and microwave for 10-15 seconds.
- Flameless candle warmers – Use tea light warmers for gentle marshmallow roasting.
Set up a s'mores bar with various ingredients: chocolate varieties, flavored marshmallows, and different crackers.
You'll create memorable moments while keeping everyone safely indoors.
Make Slime Together
Slime-making alters a dreary afternoon into a hands-on science experiment that kids absolutely love. You'll need basic slime ingredients like glue, contact lens solution, and baking soda to create this tactile wonder. Let children choose slime colors and slime scents to personalize their creations, encouraging ownership and creativity.
| Slime Themes | Slime Textures | Slime Tools |
|---|---|---|
| Galaxy glitter | Fluffy cloud | Mixing bowls |
| Ocean blue | Crunchy beads | Measuring cups |
| Rainbow swirl | Butter smooth | Wooden spoons |
| Glow-in-dark | Stretchy clear | Storage containers |
Explore slime science by discussing polymer chains and chemical reactions happening before their eyes. Create slime challenges like “longest stretch” or “best bubble pop” to maintain engagement. Proper slime storage in airtight containers extends the slime fun for weeks. This activity builds fine motor skills while teaching patience and following instructions—essential life skills you're helping them develop through play.
Have a Tea Party
After all that tactile, hands-on play, your little ones might enjoy something more elegant and imaginative. A tea party offers wonderful opportunities for creativity, social skills, and pretend play that'll keep children engaged for hours.
Start by letting kids help choose tea party themes—whether it's teddy bears, princesses, or garden fairies. This ownership increases their investment in the activity.
Essential Tea Party Elements:
- Creative invitations – Have children design and deliver handmade invites to stuffed animals or family members.
- Table setting – Use plastic dishes for safety while teaching proper placement of cups, plates, and napkins.
- Menu planning – Prepare simple, age-appropriate snacks like crackers, fruit slices, and juice in teacups.
- Dress-up station – Gather scarves, hats, and costume jewelry for alteration fun.
You're encouraging important life skills like hospitality, communication, and etiquette while creating magical memories.
Remember to supervise younger children closely around small accessories and food items.
Create a Time Capsule
While tea parties spark imagination in the present moment, creating a time capsule lets children capture today's treasures to rediscover in the future. This meaningful activity encourages kids to reflect on what matters most while building anticipation for years ahead.
Help children select a sturdy container—a shoebox, mason jar, or plastic bin works perfectly. Guide them in choosing time capsule themes like “Our Family Today,” “My Favorite Things,” or “2024 Memories.” They'll carefully select memory treasures: drawings, photos, handwritten notes, small toys, or newspaper clippings.
Encourage kids to write letters to their future selves, describing current dreams and daily life. You're helping them develop gratitude and self-awareness through this process.
Seal the container together and mark an opening date—perhaps one, five, or ten years ahead. Store it safely in a closet or attic. This screen-free activity creates lasting value while teaching children to cherish meaningful moments.
Frequently Asked Questions
How Do I Get Kids to Clean up After Indoor Activities?
Make cleanup fun by turning it into a game with timers or music. Establish consistent cleaning routines so kids know tidying up is part of every activity.
Use positive reinforcement by praising specific efforts: “You sorted those blocks so carefully!”
Create age-appropriate tasks—toddlers can match colors while older kids handle detailed organizing.
Model the behavior you're teaching, and they'll follow your lead.
What if My Child Has Sensory Sensitivities to Certain Materials?
Research shows 1 in 6 children experience sensory processing difficulties.
You'll want to offer sensory friendly materials like soft playdough, smooth wooden toys, or silky fabric scraps instead of rough textures.
Focus on calming activities such as water play, gentle music, or building with foam blocks.
Always let your child lead—they know their comfort zones best.
You're creating a safe space where they can explore without overwhelm, and that's wonderful parenting in action.
How Can I Adapt Activities for Different Age Groups Simultaneously?
Choose multi age crafts where each child contributes at their skill level—older kids cut shapes while younger ones glue them.
You'll find cooperative games like building blanket forts or treasure hunts work beautifully since everyone has a role.
Assign age-appropriate tasks within the same activity: preschoolers sort materials, school-age children follow instructions, and teens lead younger siblings.
This approach keeps everyone engaged while promoting teamwork and patience, teaching your children to support one another's abilities.
What's the Recommended Duration for Indoor Activities Before Switching?
You'll want to match activity duration to attention spans: 10-15 minutes for toddlers, 20-30 minutes for preschoolers, and 30-45 minutes for school-age children.
Watch for restlessness or frustration—these signal it's time to change gears. You're serving your family best when you stay flexible and responsive to their needs.
Keep shifts smooth by preparing the next activity beforehand, ensuring everyone stays engaged and safe throughout your rainy day adventures together.
How Do I Handle Sibling Conflicts During Group Activities?
Before tensions explode, you'll want to intervene quickly with proven conflict resolution strategies.
Pause the activity immediately and guide each child to express their feelings calmly. Redirect their energy toward sibling cooperation by assigning complementary roles—one child holds materials while another creates.
You're teaching life skills, not just managing behavior. If conflicts persist, separate them briefly with individual tasks, then reunite for a fresh collaborative project where everyone's contribution matters equally.
Conclusion
You've got a treasure chest of rainy day adventures now, and not a screen in sight! These activities convert gloomy weather into opportunities for creativity, movement, and family bonding. Remember to keep safety first—cushion those obstacle courses and supervise messy projects. Don't let the rain dampen your spirits; instead, embrace it as your invitation to build memories that'll shine brighter than any sunny day. Now grab those blankets and let the fun begin!
Related Articles
- The Ultimate Guide to Sibling Conflict
- The Ultimate Guide to Family Meal Planning
- The Ultimate Guide to Kids Educational Games
- 20 Fun DIY Crafts to Strengthen Family Bonds

Written by Sarah Mitchell, M.S., CFLE
Founder & Lead Editor
Sarah is a Certified Family Life Educator with a Master's degree in Human Development and Family Studies from the University of Missouri. With 15+ years of experience as a parent educator and mother of three, she brings both professional expertise and real-world parenting wisdom to every article.
Credentials: M.S. in Human Development and Family Studies, Certified Family Life Educator (CFLE)