You know that moment when your kids are bouncing off the walls, and you realize you’re out of ideas to keep them entertained? We’ve all been there! Last rainy Saturday, we whipped up a backyard obstacle course with stuff we already had lying around. Not only did it keep them busy, but it also turned into one of those unexpected wins—who knew a few old tires and some pool noodles could spark so much joy? You can create your own fun course for under $50. Trust me, it’s simpler than it sounds, and your kids will love it. You’ve got this!

Key Takeaways
- Gather materials like cardboard boxes, pool noodles, and old tires for under $50 — using everyday items keeps costs low while promoting creativity in obstacle design.
- Set up your course on a flat, grassy area to prevent injuries — a soft surface cushions falls, ensuring a safer play environment for kids.
- Create three to five simple obstacles, such as crawling under ropes and jumping over tires — varied challenges cater to different skill levels, enhancing overall fun and engagement.
- Visit local thrift stores and dollar shops to find affordable supplies — sourcing materials this way can significantly reduce costs and support community businesses.
- Supervise playtime closely and inspect obstacles weekly for wear — regular checks maintain safety and prolong the lifespan of your homemade course.
Introduction
You know those weekends when the kids are bouncing off the walls, and you’re scrambling for something to keep them busy? I’ve been there. The good news? You can set up a backyard obstacle course for under $50. Seriously.
Using everyday items you probably already have, like old tires or pool noodles, you can create a fun space that gets everyone moving. Just remember, safety first. Think soft ground surfaces like grass or mulch—no one wants a scraped knee on top of everything else.

Get creative with household items and prioritize safety with soft surfaces for endless backyard fun.
And keep an eye out for sharp edges or anything that might tip over. Make sure the obstacles match your kids’ skill levels. You want them to challenge themselves, not feel defeated. For our family, that means we keep it simple and adjust as we go.
My youngest is only 4, so we stick to low hurdles and balance beams made from sturdy wood. Full disclosure: we’ve had some tumbles and a few tears, but that’s part of the fun, right?
Quick Win: Start with a simple tunnel made from cardboard boxes. Kids love crawling through them, and you might even have the boxes lying around!
If you’re working with younger kids, always supervise them, especially around anything that could tip or fall. And let’s be real: this can get messy, especially if it rains. Keep a backup plan for when the weather doesn’t cooperate—maybe a movie marathon or some indoor crafts?
We've learned the hard way that sometimes, the best plans go sideways. With a little creativity and careful planning, you can turn your backyard into a mini adventure park. Engaging in outdoor activities can also strengthen family bonds and create lasting memories.
What if you’re short on time? Set aside just 30 minutes to gather materials, and you’ll have your course ready for a weekend of fun.
And for those of you with older kids, consider adding more challenging elements, like a mini rock wall or a balance beam. Just remember to check in with them about their comfort level. Not every kid is going to want to tackle something high or tricky.
Overview
With those simple materials in hand, you might wonder how to transform them into a thrilling obstacle course.
This setup not only promises excitement but also invites creativity in its design.
Let’s uncover the elements that contribute to its popularity and guide you through the process of building your own.
What You Need to Know
Creating a backyard obstacle course for under $50? Sounds crazy, right? But trust me, it’s totally doable. We’ve tackled this on a few weekends, and the kids loved it. Here’s how to make it happen, without breaking the bank or your sanity.
First things first: safety. Always choose a flat, clear area for the course. We’ve learned the hard way that sharp objects or tripping hazards can turn fun into chaos.
Keep an eye on the kids, especially if they’re under 5; they tend to be a bit wobbly. A good rule? Supervise them at all times, especially if there are any heights involved. And let’s be real—always have a first aid kit on hand. You never know when a scraped knee might happen.
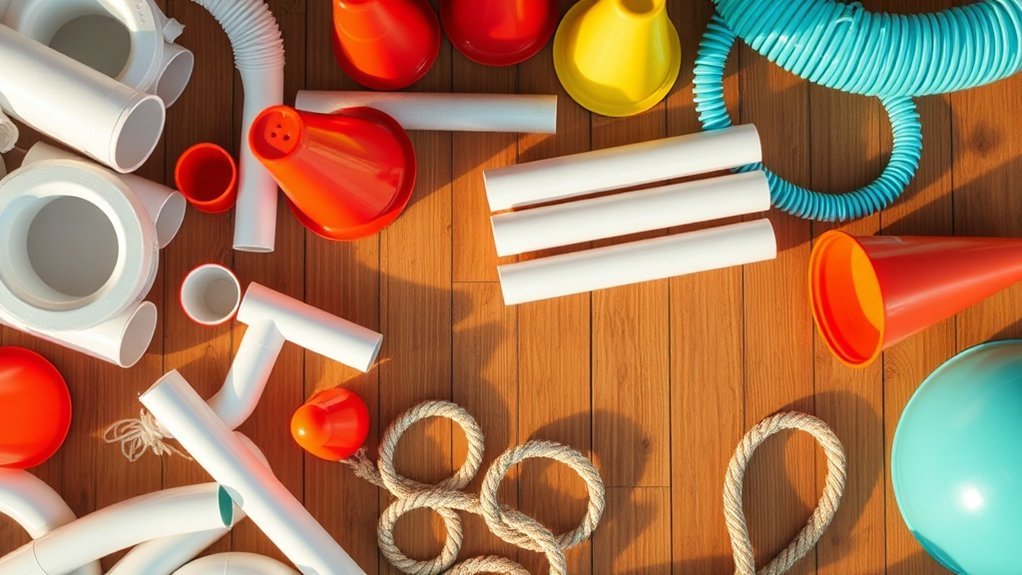
Now, let’s talk about materials. PVC pipes, ropes, and old tires are your best friends here. You can usually find these cheap or even free. Thrift stores or community groups might've what you need.
Just make sure everything is sturdy and secure. We’ve had a few wobbly setups, and it’s not fun to watch kids tumble over.
When planning your obstacles, think about different skill levels. You want everyone to feel included, right? Maybe start with something simple, like crawling under a rope or jumping over a tire.
As they get more confident, you can up the ante. Just remember—if they’re having a meltdown because something’s too tricky, it’s okay to lower the bar.
And what about the weather? If it’s drizzling, we’ve had great days moving the fun under a covered patio or using large umbrellas. Rain doesn’t have to ruin the fun, just shift your approach a bit.
Now, let’s not forget about the maintenance. After a few rounds of fun, check for wear and tear. You don’t want anything breaking mid-play.
If you notice something’s a little off, fix it up before the next playdate.
So, what’s the takeaway? You can create a budget-friendly obstacle course that’s safe and fun for all ages. Just keep it simple, stay aware of your surroundings, and don’t be afraid to adjust as needed.
What’s your go-to DIY activity for the kids? Share your ideas!
Why People Are Talking About This
Budget-friendly backyard obstacle courses are all the rage right now, and honestly, it’s easy to see why. If you're like me, you’re always on the hunt for ways to keep the kids entertained without spending a fortune or sacrificing safety. These courses can be a fun, active solution right in your own backyard, and you can tailor them to fit your family's unique vibe.
We’ve set up our own course and it was a hit! It doesn't have to cost a ton either. Think pool noodles, cardboard boxes, and old blankets—these are all great for making your course on a budget. You can even use things you already have around the house. Just keep an eye on the age-appropriateness of the setup. For younger kids, like my 4-year-old, sticking to lower heights and soft landings is key. Always supervise and be mindful of choking hazards with small pieces.
You know how it goes; some days are chaos and some are pure joy. We've all been there, right? The kids get into it, and then suddenly there’s a meltdown because someone didn’t get a turn. It happens. You’re doing fine. Maybe keep some cool-down options nearby—like a cozy blanket and a book—for those times when the fun turns into frustration.
What really got people talking about these courses is how they promote outdoor play, build coordination, and boost confidence. It’s amazing to see the kids work together and cheer each other on. In our house, that little bit of teamwork and support has made a big difference. Just be sure to set up a safe environment with soft materials to minimize injury risks. We learned the hard way that a tumble on concrete isn’t great for little knees!
And let’s not forget about seasonal factors. If it's a sunny Saturday, that’s perfect! But if it’s pouring rain, you might want to have a backup plan. We’ve tried some indoor courses too, using furniture and cushions—just make sure to keep safety in mind.
So, here’s a quick win for you: gather some materials and set a timer for 30 minutes. Challenge the kids to help create their own course. It’s a fantastic way to get everyone involved, and you might just find a new family favorite activity.
History and Origins
You might be surprised to learn that backyard obstacle courses started as simple playground challenges years ago.
Over time, they’ve evolved into creative setups you can build yourself without spending a fortune.
With this foundation in mind, let’s explore how you can transform your backyard into a fun and exciting obstacle course that brings the thrill of those early playgrounds to your home.
Early Developments
Got a rainy Saturday ahead and kids bouncing off the walls? We’ve all been there! Backyard obstacle courses are a fantastic way to burn off that energy, and they don’t need to cost a fortune. Believe it or not, these courses have roots in military training, designed to boost agility and endurance. But we’re not here for boot camp vibes—let’s keep it fun and safe for our little adventurers.
When building your course, think about the basics: balance, strength, and coordination. You don't need fancy gear—old ropes, logs, or even sturdy cardboard can do the trick. Just be sure everything's secure and ready for action. Safety first, right?
For younger kids, keep obstacles low and avoid anything slippery. I’ve learned the hard way that a slick surface can lead to tears rather than cheers. If you’ve got kids under 5, stick to softer, shorter challenges to avoid any meltdowns.
How about some budget-friendly tips? You don’t need to break the bank here. A few hula hoops for jumping through or some cones for weaving can be found at dollar stores or even made from stuff around the house.
And if you're juggling nap times and school schedules, you can set this up in just about 30 minutes.
Got a mixed-age crew? Supervise those younger ones closely, especially around taller obstacles. And let's face it—sometimes, things don’t go as planned. Maybe the course looks great, but your kids decide it's a no-go. That's when you pivot.
Try a game like “Simon Says” or “Follow the Leader” to get everyone moving without the formal setup.
Here’s a little insight from our own experience: we once tried to make a “climbing wall” with some old pallets. It was a disaster—way too wobbly. We ended up turning it into a fort instead, and guess what? It was the highlight of the day!
How It Evolved Over Time
You know those days when the kids are bouncing off the walls? We’ve been there! Sometimes, all you need is a little outdoor chaos to channel that energy — and that’s where obstacle courses come in. They’ve come a long way from military training drills to something you can whip up in your backyard.
In our house, we've turned everyday items into fun challenges. Think pool noodles, hula hoops, and even old cardboard boxes. It doesn’t have to cost a fortune! You can create a course with stuff you already have, and your kids will love it.
Just make sure to keep safety in mind — that means supervising little ones, especially if they're under 4. You don't want them tripping over anything sharp or getting too ambitious with heights. You can set up soft surfaces for landing zones or use cushions for a safe obstacle. Trust me, those little adjustments can save you from a meltdown when things go sideways.
When we first tried this on a sunny Saturday, I thought it would be smooth sailing. But my 4-year-old had different ideas! He got a little too excited and took a tumble. We learned the hard way that keeping things low and slow is key. It’s all about balancing challenge and safety, right?
Here’s a quick win: start with a simple design. Maybe a zig-zag path to run through or a tunnel made of chairs. You can easily adjust the difficulty as they get the hang of it.
What’s great is that these courses can fit any season. If it’s raining, try an indoor version with pillows and blankets. Just keep an eye out for anything that could be a choking hazard, especially with younger kids around.
And don’t forget about screen time! The AAP suggests limiting screen use to an hour a day for kids ages 2 to 5. So, why not swap some of that time for obstacle course fun? It’s a win-win for everyone.
How It Actually Works
To truly appreciate the fun and safety of the obstacle course, it’s essential to explore how the core mechanism operates.
With a solid understanding of the foundational elements, we can now uncover the intricate details that ensure everything runs smoothly and effectively.
What goes on behind the scenes? Let’s take a closer look at the inner workings that make it all possible.
The Core Mechanism
Ever had one of those weekends where you need an activity to keep the kids occupied but don’t want to break the bank? Yeah, same here. We’ve found that building a backyard obstacle course can be a total game changer. It’s not just fun; it’s a great way to get them moving and using their imaginations.
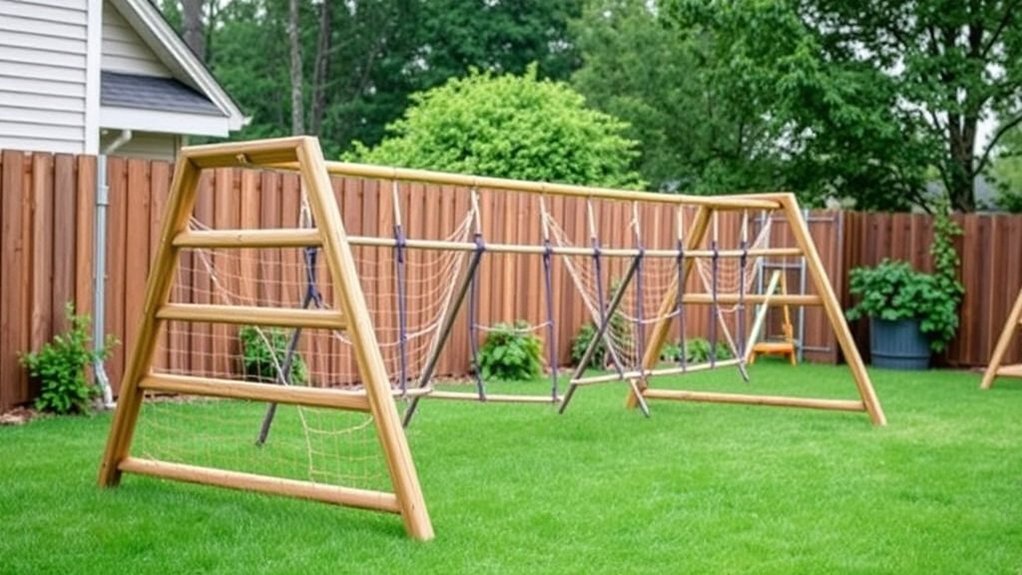
So, here’s the scoop: the core of your obstacle course boils down to three simple components. First up, an adjustable framework. This lets you tweak the height and challenge level based on your kids’ ages and skills. Just remember, safety first! For little ones under 5, keep things low to the ground and always supervise them closely.
Next, balance elements like beams or ropes are perfect for practicing coordination. They’ll keep the kiddos engaged and help build confidence. You might want to keep an eye out for any sharp edges or hazards—trust me, that’s a lesson learned the hard way. My youngest took a tumble once, and I quickly realized how important it's to keep things cushioned.
Finally, the connection zones. These are the spots that link everything together and help avoid trips and spills. Think of them as your safety net. If you can, use materials that are soft and forgiving, especially if you have younger kids.
Now, let’s talk budget. You don’t need to spend a fortune to create an awesome course. You can use items you already have at home, like old pool noodles or sturdy cardboard boxes. Want to splurge a little? Check out some second-hand sports gear for balance beams or climbing structures.
And hey, if it rains or the kids just aren’t feeling it, pivot! We’ve had to scramble for indoor alternatives on more than one occasion. A scavenger hunt or a DIY craft day can save the day.
What’s your go-to rainy day activity?
In our house, we’ve learned that the best memories often come from the most chaotic moments—so embrace the mess! Just remember, there’s no one-size-fits-all here. Tailor the course to your family’s needs, keeping in mind that kids develop at different rates. The AAP suggests promoting physical activity as a key part of a healthy lifestyle, so get creative!
Try setting up a mini course today and see what your kids come up with. You might be surprised by how much joy a little chaos can bring!
Key Components
Building a backyard obstacle course can feel like a tall order, right? But trust me, it can be a blast without breaking the bank or overwhelming yourself. We've all had those chaotic weekends, where the kids need something to do, and you're just trying to keep the peace. Here’s how to make it fun and safe, without turning into a Pinterest-perfect parent.
Key Components to Consider
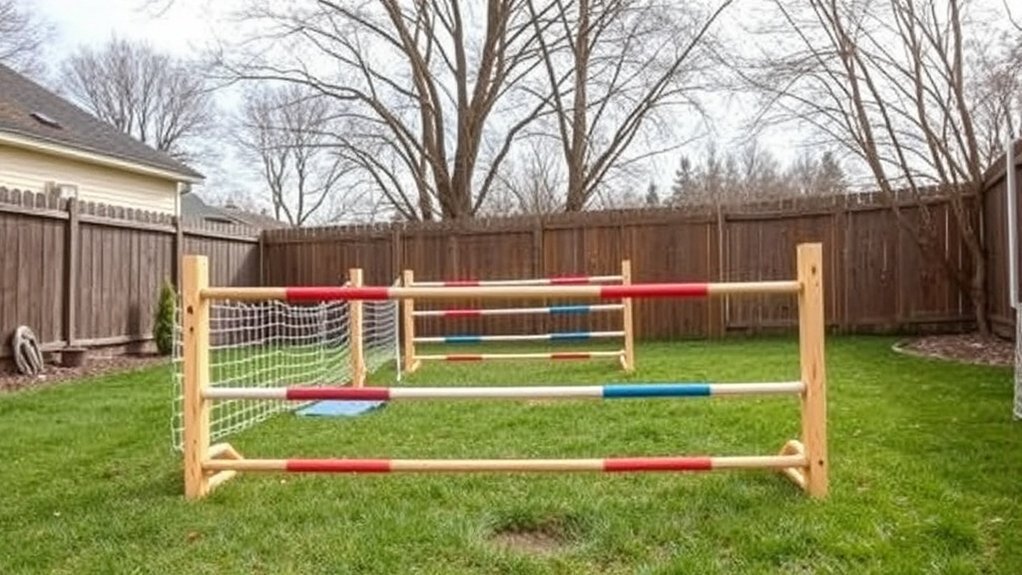
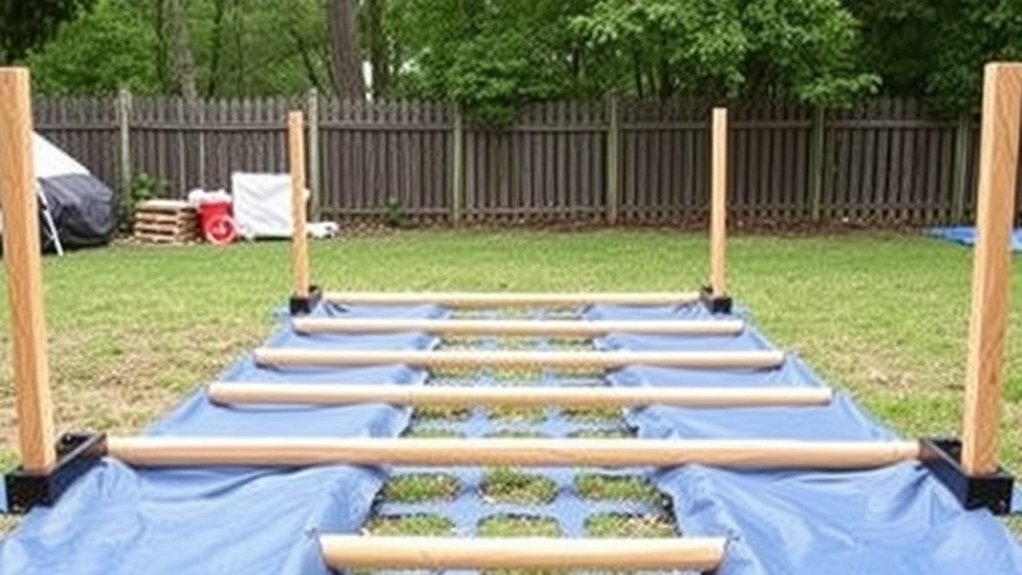
- Stable Base Materials: Think sturdy and non-slip. We’ve used old wooden planks and even some leftover mats from the garage. It doesn’t have to be fancy! Just make sure whatever you use won’t slide around. Falls happen—let’s minimize the risk.
- Clear Boundaries: Grab some cones or even rope to mark the course edges. This keeps everyone on track and avoids any unexpected trips. Trust me, it’s a lifesaver. Been there with a kid running off and a sibling in hot pursuit—it’s a recipe for chaos!
- Adjustable Difficulty: Kids are all at different skill levels. We often modify hurdles by stacking some cushions or adjusting heights. This way, everyone can participate without feeling left out. Sound like your Tuesday?
- Safety Padding: Foam or cushions around tricky spots can really save the day. We’ve learned the hard way that a little padding goes a long way in preventing scrapes and tears.
Safety First
A few quick safety reminders:
- Age-Appropriate Guidance: For younger kids, think about keeping obstacles lower to the ground. Supervise closely—especially with anything involving heights or water.
- Choking Hazards: Keep small objects out of reach. This isn’t just a kid's play area; it’s a mini-adventure zone!
- Supervision Levels: If your kids are under 4, you’ll want to be right there with them.
Budget-Friendly Tips
You don’t have to spend a fortune to create a fun space. Check out local thrift stores for cheap materials, and ask friends for anything they might've lying around. We’ve used old tires and even pool noodles for hurdles—super cheap and super fun!
When Things Go Sideways
Let’s be real: not every idea pans out. If the kids start melting down, take a break. A snack or a quick game can reset the mood.
And if it’s pouring outside? Indoor courses can be just as fun—think couch cushions and blankets.
Timing Matters
Building the course? You can usually set it up in under an hour. But don’t forget to factor in snack time and any surprise meltdowns!
What We Learned the Hard Way
We once built a ramp that looked great but turned out way too slippery. Cue the tears! Always test everything before your kids dive in.
And remember, it’s all about having fun—so lower those expectations a bit.
Under the Hood
You know those days when the kids are bouncing off the walls and you just need them to burn off some energy? We’ve been there! Creating a backyard obstacle course can be a lifesaver. But before we dive in, let’s talk about a few key things to keep it safe and fun for everyone.
Once you gather your materials, make sure safety is front and center. Think sturdy construction and simple physics — it really makes a difference. Each element, like balance beams or hurdles, should support weight and promote controlled movement. We’ve found that checking that everything’s securely anchored helps prevent those inevitable tumbles. Trust me, no one wants a tipping balance beam when your kid's halfway across it!
Soft landings matter! Options like mulch or foam mats can help absorb the impact and reduce the risk of injury. Just a heads up — if you have younger kids in the mix, keep an extra eye on them. Kids under 4 mightn't have the balance for higher elements, so stick to the basics for them.
Speaking of safety, always supervise closely when they’re using the course. It’s easy to get wrapped up in the fun and forget that little ones can get into tricky situations.
Now, let’s talk budget. Not every family has $200 to drop on fancy equipment. We've found that even simple DIY options can bring joy. Think pool noodles for hurdles or cardboard boxes for tunnels. You can create an amazing course without breaking the bank. Plus, repurposing things around the house can turn into a fun family project. Got a rainy Saturday? Bring the kids in to help with the setup!
You’ll want to regularly check for wear and tighten any loose components. It’s one of those chores that feels tedious, but it pays off. We learned the hard way when a loose part sent my 5-year-old flying off a beam. Thankfully, he was okay, but it reminded us to be diligent.
And remember, the goal is to encourage skill-building at a pace that feels right for your kids. It’s all about finding that sweet spot where they’re challenged but not overwhelmed. If you notice some tears instead of cheers, it might be time to adjust things a bit.
Applications and Use Cases
| Application | Use Case |
|---|---|
| Family Fitness | Get everyone moving and having fun |
| Birthday Parties | Spice things up with fun challenges |
| Skill Development | Boost balance and coordination |
| Outdoor Learning | Teach teamwork and problem-solving |
| Stress Relief | Enjoy active breaks that refresh minds |
Family Fitness
Got a family reunion coming up? Or just a typical weekend with the kids? Engaging everyone in a bit of friendly competition can turn exercise into play. Think about setting up a simple course with hula hoops, old tires, or jump ropes. Just be sure to supervise younger ones closely—nothing like a wild tumble to remind you that safety comes first.
Birthday Parties
Ever had a birthday party that felt like a chore? A fun obstacle course can change that! Kids love a bit of competition, and it’ll keep them busy while you enjoy that slice of cake. Just keep an eye on the age range; little ones might need a bit more supervision to keep things safe and fun.
Skill Development
In our house, we’ve noticed how tackling these courses helps with balance and coordination. It’s like a sneaky way to build skills without the kids even realizing it. Just keep it age-appropriate: a course for toddlers will look different than one for older kids.
Outdoor Learning
Want to sneak in some learning? Incorporate teamwork challenges that require kids to work together. It can be as simple as passing a ball through a series of cones. They’ll learn problem-solving skills without even knowing it, which is crucial for screen-free activities that foster family connections.
Stress Relief
And let’s be real—sometimes you just need a break. A quick run through the course can refresh everyone’s mind (including yours!). Keeping it low-key means you can adapt to whatever mood strikes.
A Few Tips:
- Supervision: Always keep an eye on younger kids, especially if they’re near anything that could pose a risk—like water or heights.
- Budget-Friendly Options: You don’t need to spend a fortune. Use cardboard boxes, pool noodles, or even old chairs to create obstacles.
- Rainy Day Backup: If the weather turns on you, consider moving the obstacle course inside. Pillow forts can make for great indoor challenges!
What We Learned the Hard Way: One Saturday, we set up a course only to have our 4-year-old decide it was really about jumping into the kiddie pool instead. It turned into a splash fest, but hey, we all ended up laughing and cooling down.
Advantages and Limitations
Setting up a backyard obstacle course for under $50? Sounds like a blast, right? We've tried this on a rainy Saturday, and let me tell you, it was a win in our house. The kids were running, jumping, and giggling, and I felt like a rockstar parent for keeping them active without breaking the bank. But, let’s keep it real — there are some things to think about.
What’s Great:
- Affordable Fun: You can snag materials from your local dollar store or even use stuff you already have lying around. Old tires, pool noodles, and cardboard boxes can do wonders.
- Get Moving: It’s a great way to get the kids off screens and into some good old-fashioned physical activity. Plus, it’s customizable, so you can adjust the course based on your kids’ ages and abilities.
The Flip Side:
- Safety Concerns: You won’t get the same safety features as a professional setup. That means keeping an eye on younger kids (think 4 and under) to avoid tumbles and bumps. Always supervise, especially with heights or anything that could tip over.
- Weather Woes: If you’re in a rainy area, keep in mind that your course mightn't last long. Water can make things slippery, and exposure to the elements can wear down your materials.
- Short Lifespan: Let’s be honest, this won’t last forever. Those cardboard boxes? They’ll be mush in the rain. It’s budget-friendly, but don’t expect a lifetime of use.
Quick Tip: If you’re worried about safety, consider padding sharp corners and keeping an eye out for any choking hazards — small pieces from broken toys can sneak in there.
Engagement Break: What’s your go-to rainy day activity? Have you ever tried making a DIY project with the kids?
At the end of the day, every family looks different, and that’s okay. What works for us mightn't work for you. Just remember to lower the bar sometimes. Not every obstacle course is going to be Instagram-worthy.
What We Learned the Hard Way: We once built an epic course only to have the kids argue over who got to go first. Cue the meltdown. So, keep it simple and maybe set a timer for each turn. That way, everyone gets a shot, and you can avoid the chaos.
Additionally, test anxiety can impact children’s ability to perform well in various activities, including fun challenges like this.
The Future
As you consider creating your own backyard obstacle course, think about how the latest trends can enhance both enjoyment and accessibility.
Innovations in materials and designs not only promise increased safety but also unleash new levels of creativity.
Emerging Trends
You ever find yourself staring at the backyard, wishing it could be more than just a patch of grass? Maybe you’re juggling a couple of kids who need to burn off energy, and the usual park trip just isn’t happening today. We’ve all been there, right? Here’s a quick win: building a backyard obstacle course can be a fun, budget-friendly way to keep your little ones active and entertained.
Innovation’s making it easier than ever to create a course that’s not just cool but also affordable. Think DIY projects using recycled materials you’ve got lying around. Old tires? Plywood scraps? Perfect! Not only does this keep costs low, but it also gives your course an eco-friendly twist.
Just remember: if you’re using anything sharp or heavy, supervision is key. Kids under 5 should stick to softer obstacles to avoid injuries.
Lightweight, durable components are all the rage now. We’ve found that foam padding and non-slip surfaces make every jump and climb feel secure. Plus, modular designs let you switch things up easily, catering to your family’s skill levels.
So, if your older kid is ready to tackle a bigger challenge while the younger one needs something simpler, you can adjust on the fly. Sounds good, right?
And if you want to sprinkle in some tech, simple timers or sensors can add a fun twist without making things too complicated. Just keep it age-appropriate. The American Academy of Pediatrics suggests limiting screen time for younger kids, so balance is key.
Let’s talk safety for a moment. Always focus on sturdy anchoring and smooth edges to prevent injuries. And if you’re adding any interactive elements, keep an eye on what might pose a choking hazard for little ones.
Been there when things don’t go as planned? Maybe the kids are more interested in playing with the boxes than the course you set up. That’s okay! Just adjust your expectations and roll with it.
You can turn a failed obstacle course into a fun fort-building session instead. It happens.
As for costs, you don’t need to break the bank. Many of our best backyard activities have come from things we'd at home. A trip to the dollar store can score you some rope and cones for less than $20.
Just keep it simple and adaptable, and you’ll create a space that’s not only safe and engaging but will grow with your kids.
So, what’s stopping you? Grab some old materials and let your imagination run wild! You might just create the best weekend adventure your family’s had in a while.
And who knows? You might even find yourself joining in on the fun. What we learned the hard way? Sometimes, the messier, the better!
What Experts Predict
As a parent, you know those days when the house feels like a circus? Kids bouncing off the walls, and you’re just trying to keep everyone entertained without losing your mind. That’s where backyard obstacle courses come in. They’re a fantastic way to get your kids moving, and they can be as creative as you want.
We've found that safety should always be the first priority. Think soft materials that absorb impact, especially if your kids are on the younger side. For toddlers and preschoolers, keep things low to the ground. Supervision is key—don’t leave them alone while they’re climbing or jumping.
And let’s talk about choking hazards; small pieces can be a risk, so stick to larger components for the littles.
A big win? Modular designs! You can adjust these courses as your kids grow, keeping it fresh and fun. This means you won’t have to replace everything every few months, and you can find budget-friendly options at thrift stores or even DIY with things you have around the house. Ever used pool noodles or cardboard boxes? We’ve turned our backyard into a mini adventure land for practically nothing.
What about tech? Sure, you can add timers or sensors for a bit of friendly competition, but keep the AAP's recommendations in mind—no more than an hour of screen time for kids 2-5, and even less for younger ones. Balance is key.
Have you ever tried setting up a course on a rainy day? It might feel chaotic, but sometimes those messy moments turn into the best memories. Just grab some towels and a tarp, and let the kids slide around.
What’s worked for us? We’ve embraced the chaos, and it’s okay if things go sideways. A meltdown? Happens to the best of us. Just roll with it and maybe take a snack break.
So, here’s a challenge: this weekend, gather some items from around your house, and set up a simple course. It could be as easy as a tunnel made of chairs and blankets.
You’ll be amazed at how much fun your kids will have—and you too. And remember, it doesn’t have to be perfect; it just has to be fun.
Frequently Asked Questions
What Tools Do I Need to Build the Course?
Q: What tools do I need to build the course?
You’ll need a measuring tape, a hammer and nails (or a screwdriver with screws), and a handsaw or utility knife.
For kids around age 3, supervise closely while they help. You can find budget-friendly options at local hardware stores or even use what you already have at home.
Don’t forget gloves and goggles for safety!
How Long Does It Take to Set Up?
Q: How long does it take to set up the course?
You’ll need about 2 to 4 hours to set it up, depending on obstacles and your experience.
If your kids are 3 and up, make sure to supervise them closely.
Take your time to ensure everything’s secure.
Remember, safety first—double-check all connections and test obstacles to avoid injuries.
If you’re on a budget, consider using items you already have around the house.
Can the Course Be Customized for Different Ages?
Can the Course Be Customized for Different Ages?
Q: Can younger kids do this course?
A: Yes, kids as young as 3 can join in with supervision. For them, keep obstacles low and use soft materials to avoid any bumps.
You can also make it fun by incorporating simple tasks like crawling under low tables. Just watch out for any small parts that could be choking hazards!
Q: What about older kids?
A: Older kids can handle more complex challenges starting around age 7. You can increase obstacle heights and add tougher tasks.
If you're on a budget, consider using items from your backyard or garage instead of buying new equipment. Just ensure everything’s secure and free from sharp edges!
Q: How do I ensure safety for all ages?
A: Always inspect the course for sharp edges or unstable parts, regardless of age.
For younger kids, use soft landing spots and keep an eye out during play. If you're worried about costs, you can create a safe area in your living room with cushions and pillows to avoid any pricey setups!
Where Can I Buy Affordable Materials?
Q: Where can I find affordable materials for activities?
You can find affordable materials at dollar stores, thrift shops, and big-box retailers like Walmart or Target.
For budget-friendly options, try browsing online marketplaces like Amazon or Facebook Marketplace. Always check hardware stores for safe, sturdy supplies.
Just make sure to inspect everything for sharp edges or hazards, especially if your little ones are involved.
Q: What’s a good budget for supplies?
Budget about $15-20 for supplies, or consider using items you already have at home.
Things like cardboard boxes, old clothes, or kitchen supplies can work wonders. If you're on a tight budget, a trip to your local library for free craft ideas can be a lifesaver.
Just keep an eye on small parts that could be choking hazards for younger kids!
Q: What age can my child start using these materials?
From about age 3, with supervision, your child can start using many of these materials.
Simple crafts like collages or painting can be great at this age. Just be sure to stay close and help with anything that has small parts or sharp edges.
Always prioritize safety, and if you're concerned, you can opt for larger, safer materials.
How Do I Maintain the Obstacle Course?
Q: How often should I check my obstacle course for safety?
You should check it regularly, at least once a week.
Look for loose bolts, frayed ropes, or cracked wood. If you find anything off, fix it right away.
Involve your kids in the checks—it’s a fun way to teach them about safety!
Q: What can I do to prevent slips on the course?
Cleaning surfaces regularly helps prevent slips and falls.
Use a mild soap and water to wipe down equipment.
If you’re on a budget, consider using old towels or clothing to clean instead of buying special equipment.
Just make sure everything’s dry before playtime!
Q: How should I store soft materials during bad weather?
Always store cushions or soft materials inside during bad weather to keep them in good shape.
If you don’t have space indoors, try using a waterproof storage bin.
It’s a low-cost solution that protects your gear and keeps it ready for fun!
Q: What should I do if I notice worn-out parts?
Replace worn-out parts promptly to ensure safety.
You can often find budget-friendly replacements at local hardware stores or online.
If you’re tight on cash, check if you can repurpose materials from other projects around the house—be creative!
Q: Is there an age limit for kids using the obstacle course?
Kids around age 3 can start using it, but always supervise them.
Make sure there are no small parts that could pose a choking hazard.
If you’re looking for alternatives, consider creating a simple course with pillows and blankets—great for younger kids!
Conclusion
You've got this! Today, why not gather some old pool noodles and set up a simple balance beam? It’ll take just 20 minutes, and kids ages 5 to 10 will love the challenge. Lay them on the ground or stack them up for a bit of fun. Good enough counts, and they won't remember the mess. Just watch as they giggle while trying to walk across without falling off. This little project can spark their imagination and give them a sense of accomplishment. So, grab those noodles and let the adventure begin!